We have a very small eat-in kitchen and no dining room. There are two options for making the most of the space: custom seating and a custom table, built to maximize the utility of the room. Although the custom table is still in the works (an embarrassingly long project that I began about the same time as the custom seating and still haven’t finished), the banquette has been serving our family of four well for almost two years now.
Banquette geometry is a logical place to start. Your standard seat dimensions are good guides, but benches have some special considerations. I used this and a few other resources I found online as a jumping off point.
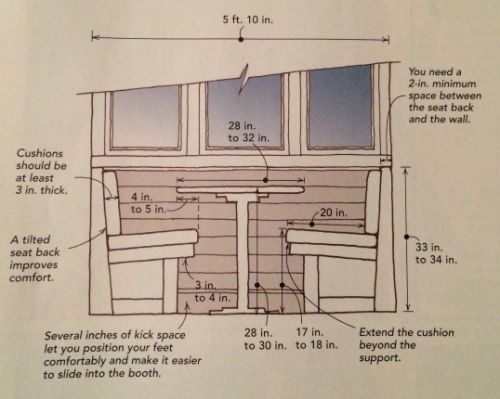
The tilted back and the seat overhang are really critical design features. The angles add some complication to the project, but I really don’t think you would want to build this with 90 degree angles just because it will make it easier. You’ll be unhappy with the outcome. Hopefully this article will show you how to do it.
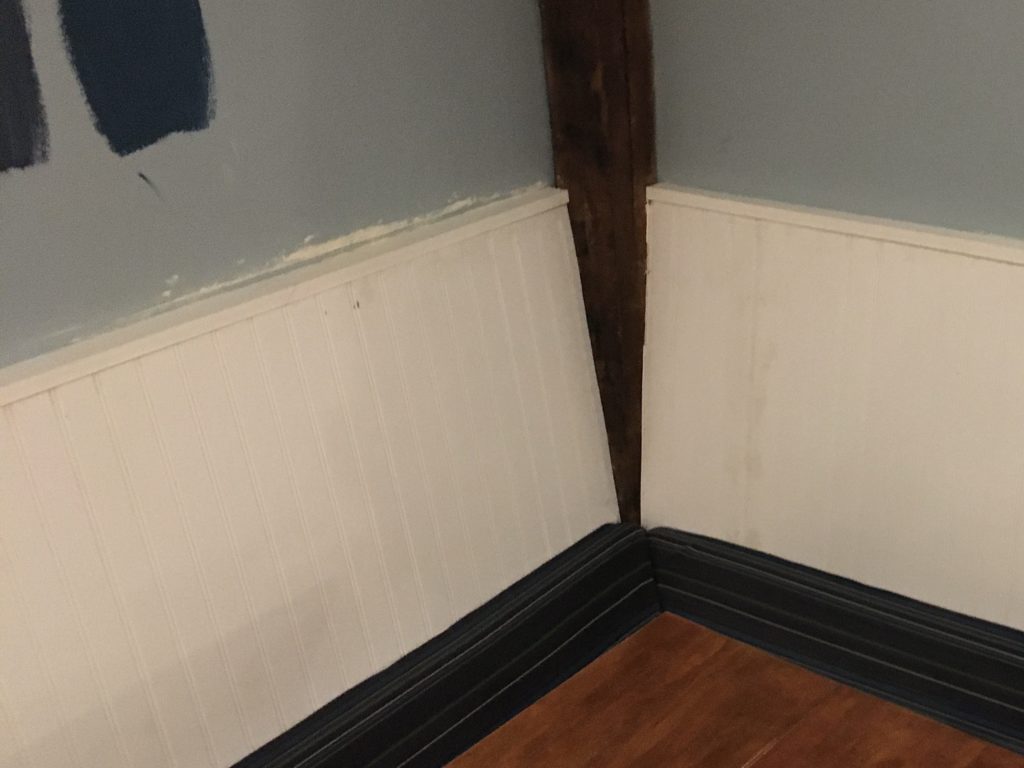
Here’s my chicken scratch drawing of the rough dimensions for my banquette. Note that I had a post to work around in the corner. And because our house was built in 1850 and the walls are rather out of square I also had different seat depths along one of the walls. Fun stuff. I
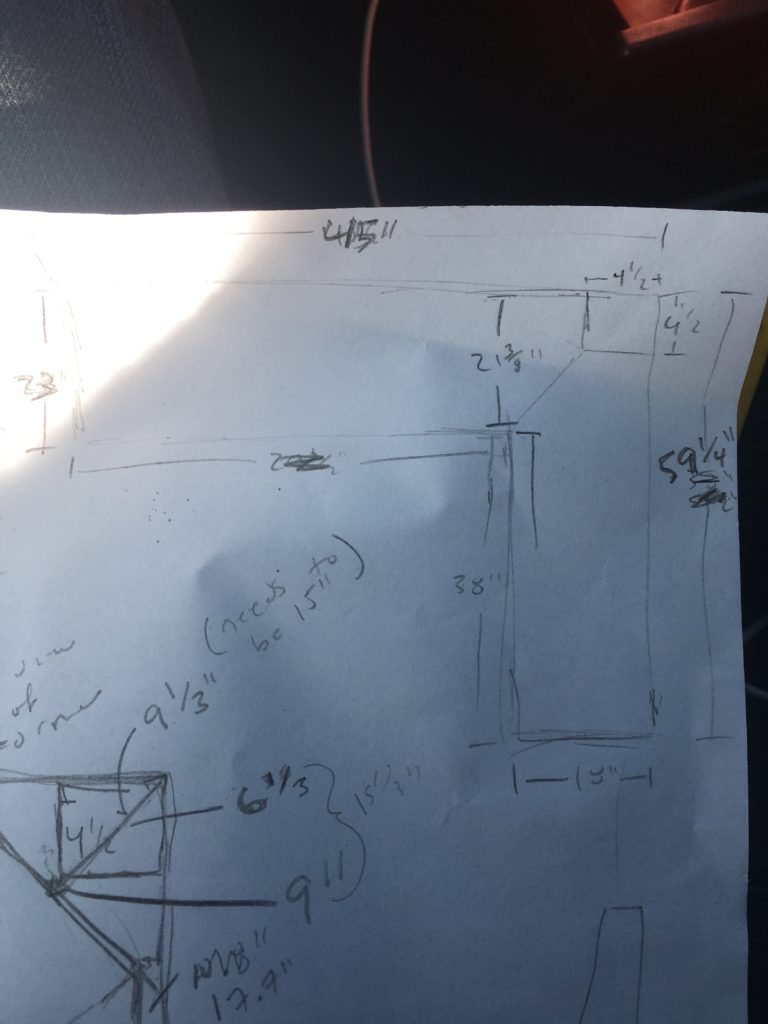
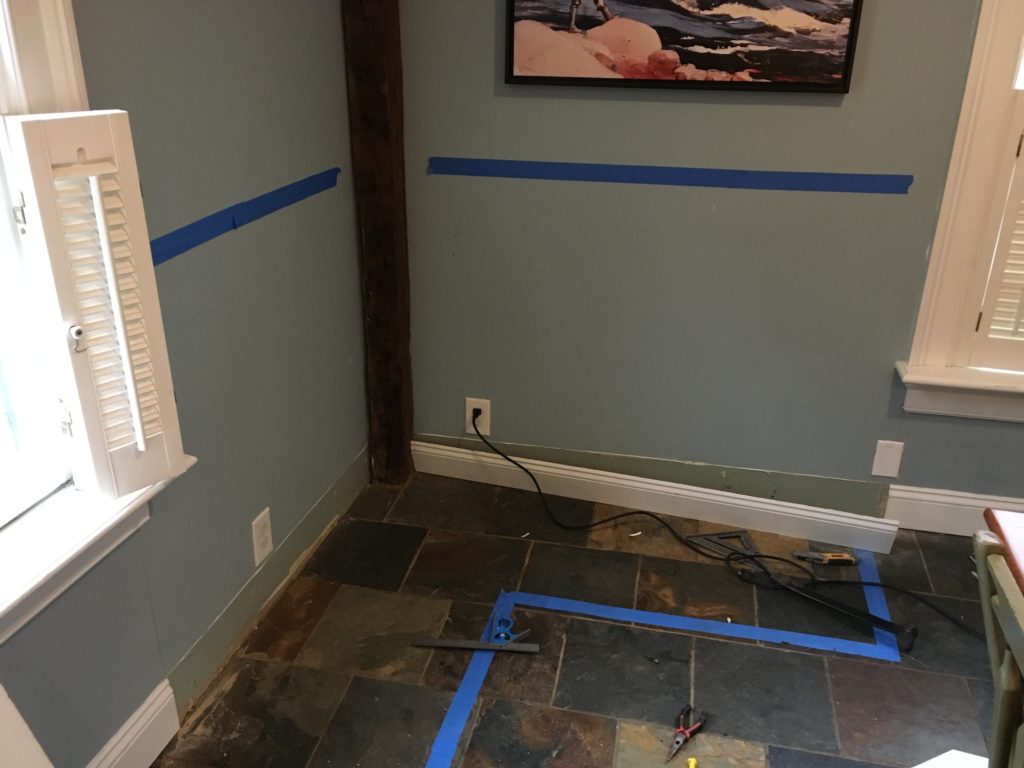
I didn’t follow this blueprint exactly. I taped this out and then slightly modified it.
The important dimensions are:
Base depth: 17″
Seat depth: 17 1/2″ from seat back to front with an extra 4 or 5″ to the wall
Seat back depth: 4 or 5″ where it meets the seat tapering to 1 1/2″ at the top
Seat back height: 23″
Seat height (not including cushion): tapers from 19″ at front to 17″ at back. The cushion adds another 1 3/4″ of height.
Seat overhang (kick space): 4″
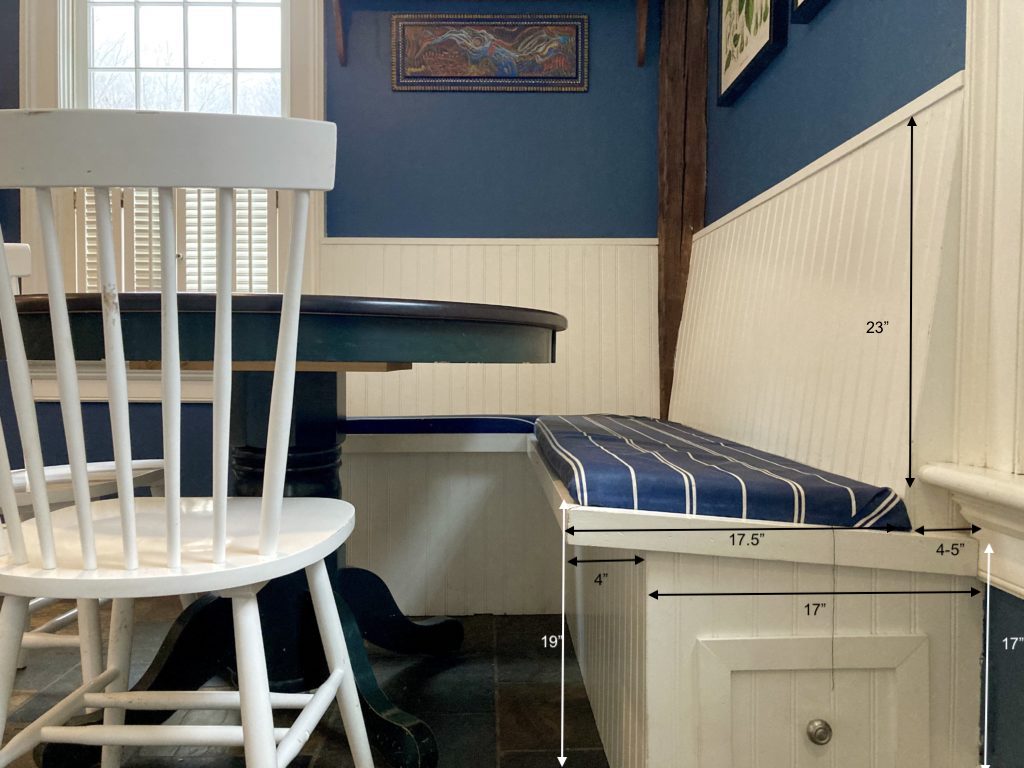
You might note these dimensions are slightly smaller than other benches or banquette dimensions you’ve found, but they are within the normal range for chairs. Since this is a small space and our family is not large in stature, it didn’t make much sense to design for the occasional plus-sized visitor. These dimensions work really well for us. The angles for the seat and back rest pitch and the amount of kick space work great and feel really natural.
With a plan in place, I cut away the baseboards and capped the electrical wires in the outlets. (When our house was gut renovated, electrical outlets were placed EVERYWHERE. I believe code is every 6 feet and they are like every 3 or 4 feet along many walls.)
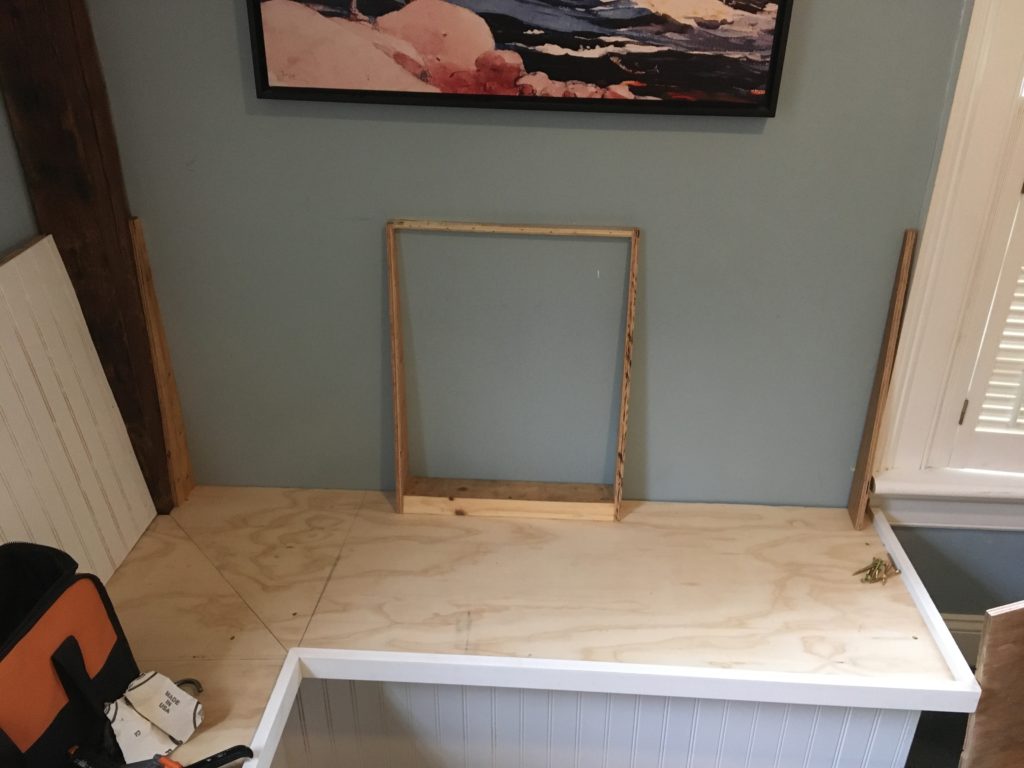
I then framed out the base of the banquette:
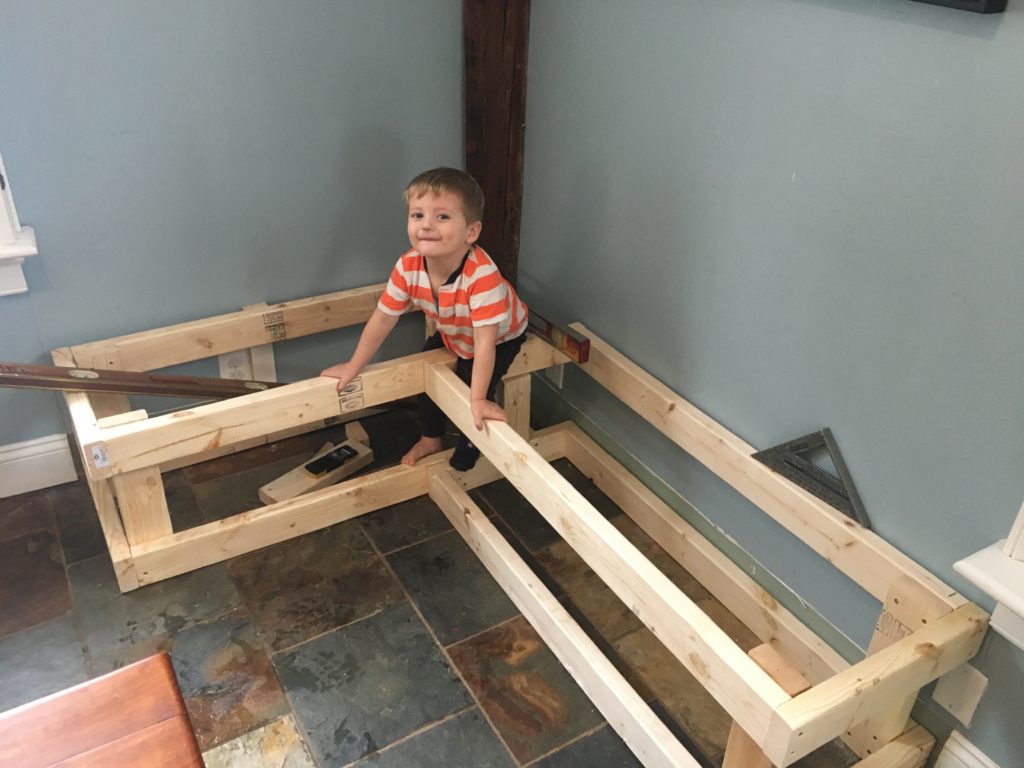
I created two different frames, one for each of leg of the “L” and then secured them to each other and to the wall framing after shimming and leveling. The framing needs to account for the depth of the finish materials, which is why there is a gap between the sides of the framing and the base boards.
Next I worked on the rough details of the seat. I worked out the angle of the seat pitch (I don’t recall what it was) and then ripped some dimensional lumber down to match the desired angle and height at the point where the seat intersected the front of the base frame (sorry, I thought I had a picture of this but can’t find it). You can figure this out with math or not. The top of the bead board siding is cut at the same angle and tucks in right under the plywood top.
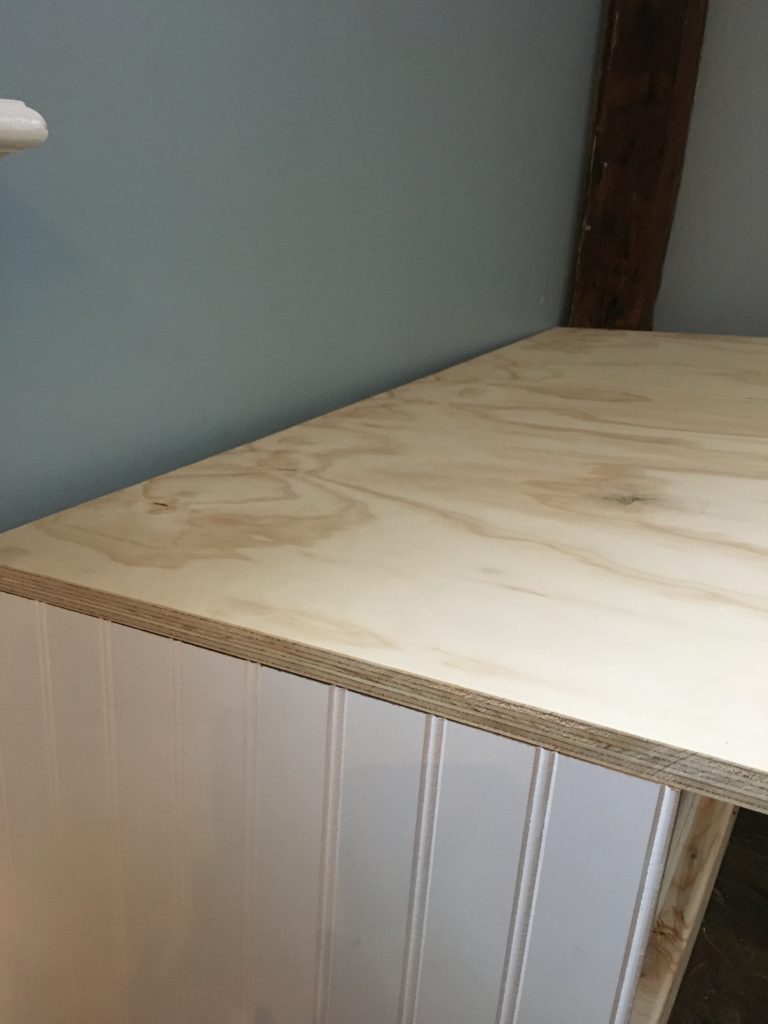
Then bead board gets wrapped around the entire base and gets construction and adhesive and brad nails to secure to the frame. The trim stands 3/4″ proud of the plywood top and will eventually serve to hold the seat cushion in place.
I tried two different approaches to the drawers. This took some planning and I wish I had put even more planning into it since they could be even better. I should have put the 2×4 studs inline with the plates and toe-nailed them in. This would have yielded an additional 3″ of drawer width and that extra storage would be nice.
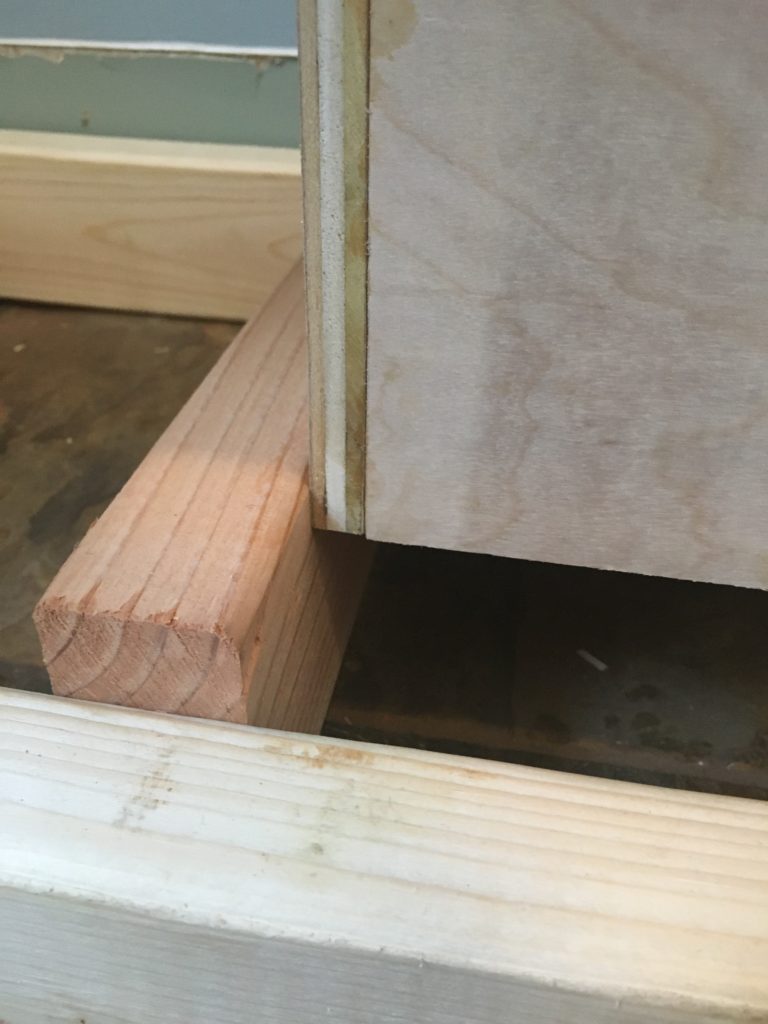
Anyway, I built the drawer boxes using some 1/2″ baltic birch plywood with a dado groove for the bottom panel, secured with brads and glue. This fast and sturdy. The first drawer I designed for use with side mount drawer slides. The drawer slides also take up some space, so after installing the first drawer I decided to try a different approach with the second one. It worked really well. I just added a 2×4 with a little runner secured to the top and then notched a groove in the back panel of the drawer box.
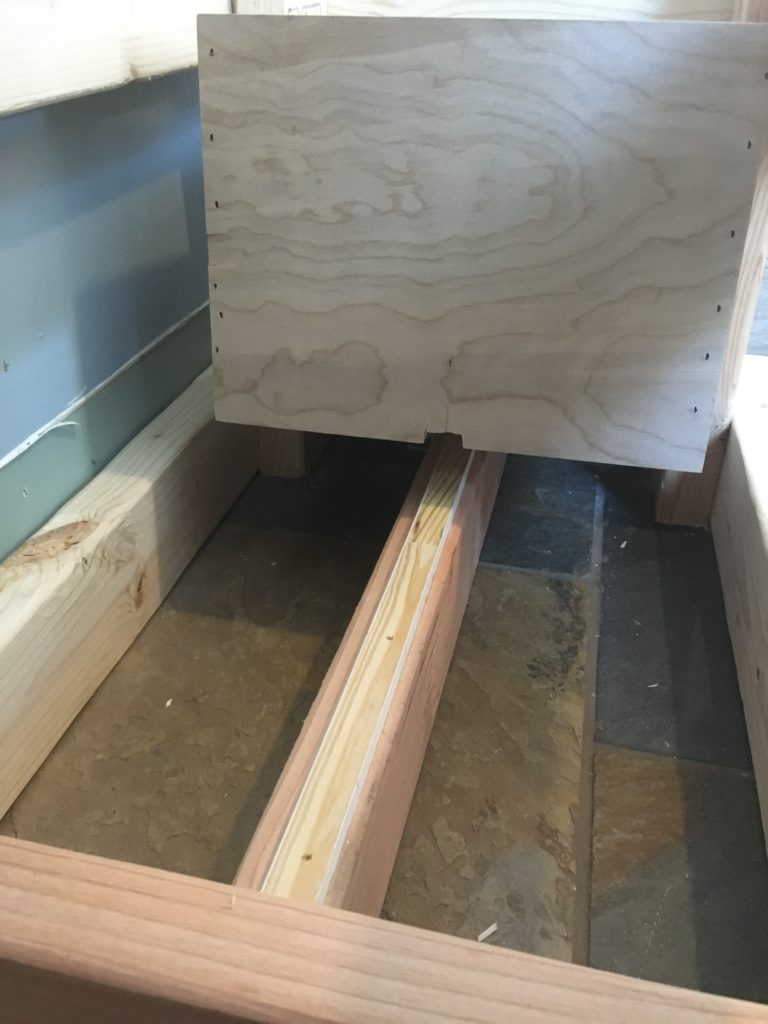
A little 2×4 “T” stop makes for a nice, clean close when the drawer is shut. Simple and plenty functional for a drawer that doesn’t get opened every day.
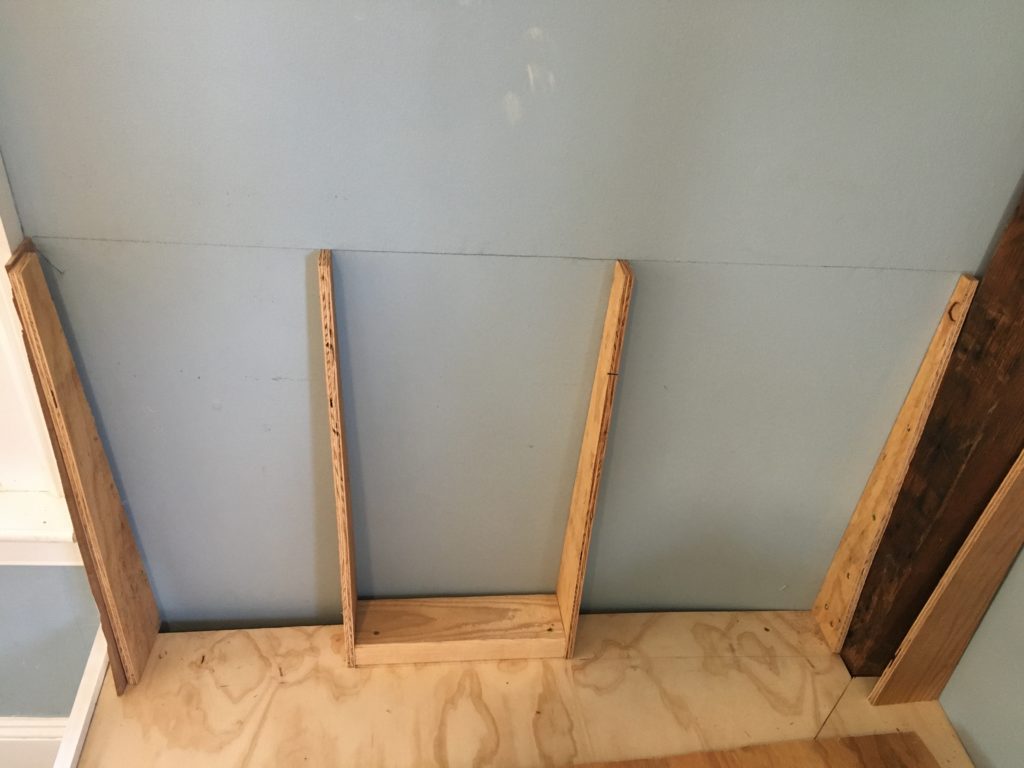
Now for the seat back. I ripped some plywood strips at the desired angle of the seat back and then secured them to the seat and the wall.
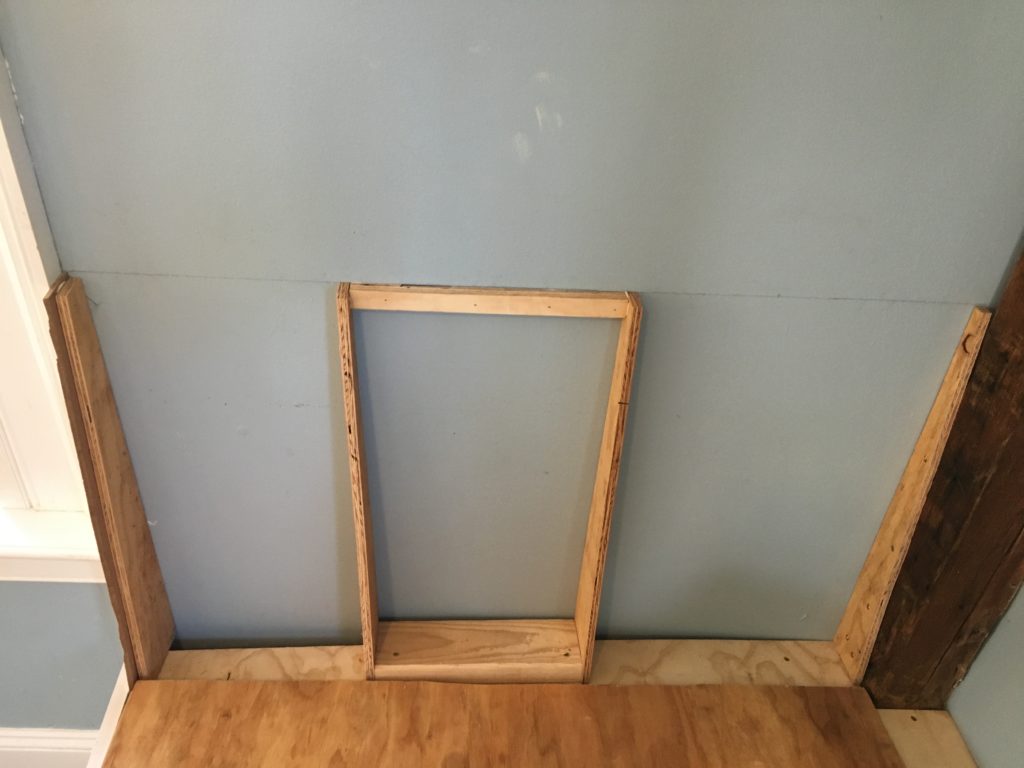
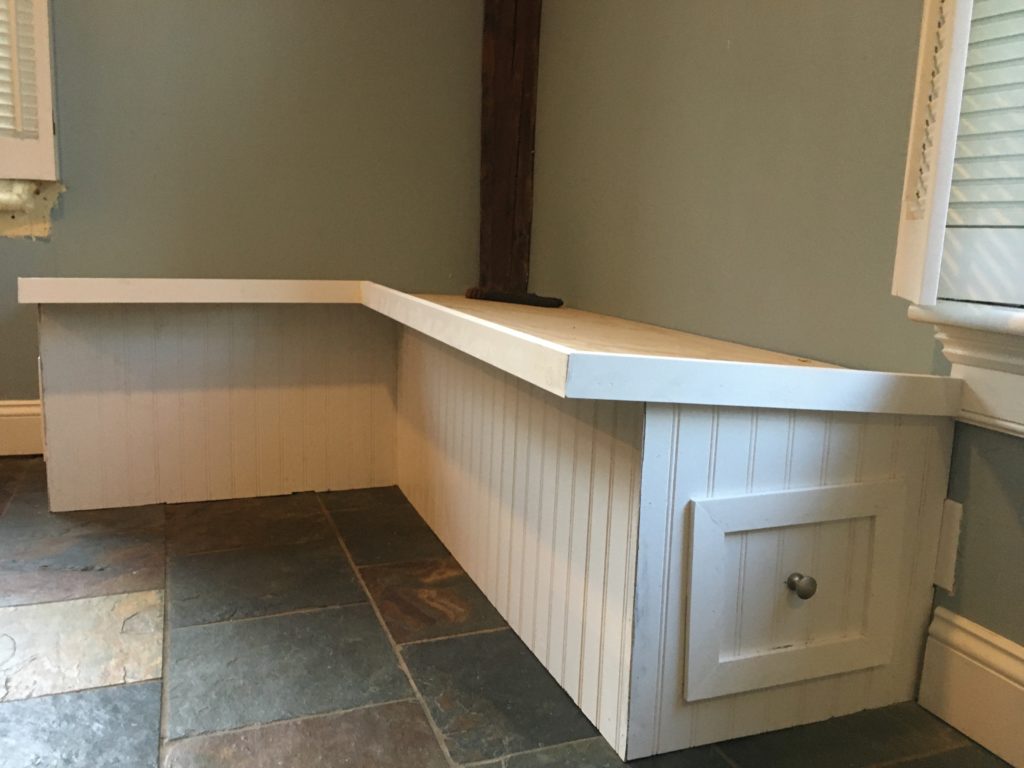
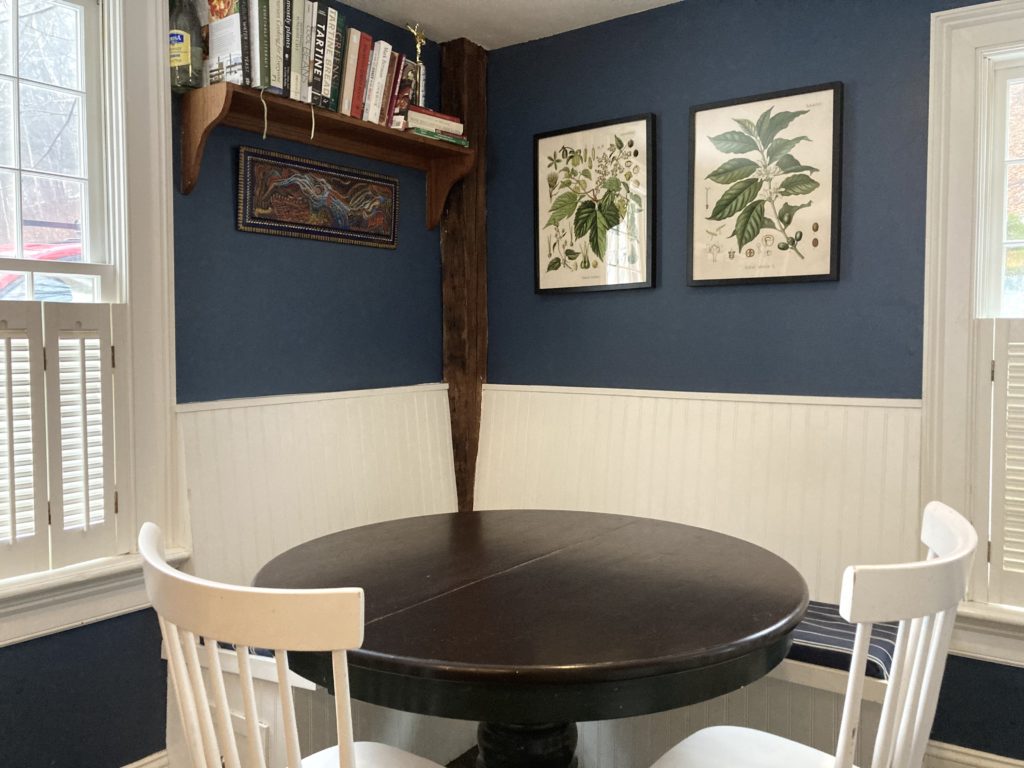
Then I added a layer of plywood topped with a sheet of bead board and capped the assembly with a piece of trim. Everything was caulked, primed, and then painted. We also decided to paint the kitchen walls a darker blue at the same time.
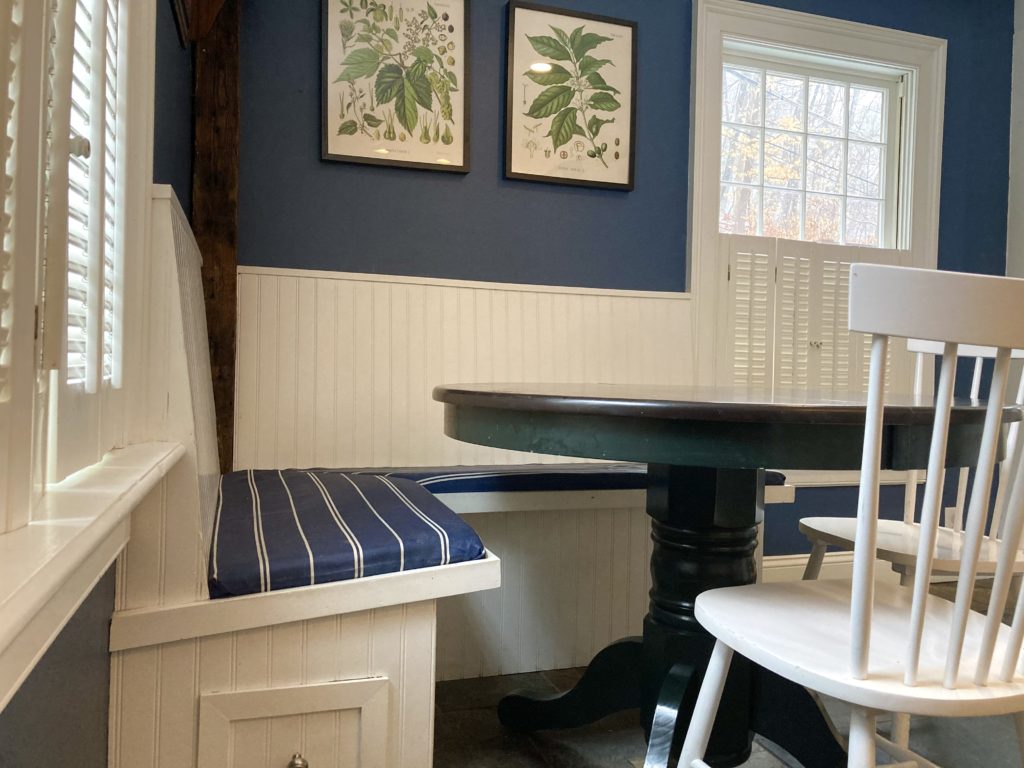
For the seat cushions, we went the super simple route for people that don’t want to learn upholstery techniques: a foam cushion wrapped in fabric and stapled to the underside of a plywood base.
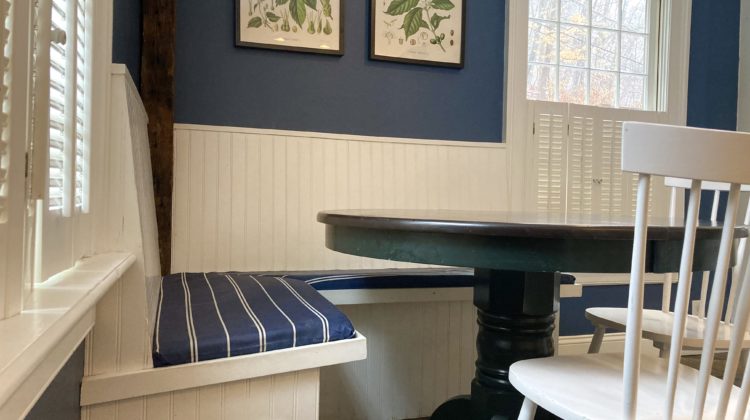
The Finished Banquette

Leave a Reply
You must be logged in to post a comment.