Hardscaping is hard work. One of the very first major projects I undertook at our farmhouse was a paver driveway. Well, driveway isn’t entirely accurate. Parking area for two vehicles is more like it. It seemed so straightforward to lay down some bricks in such a small area. “I think I’ll be able to get ‘er done in a weekend,” I told my wife. This was with the benefit of having the gravel base already in place, and so all that was on me was to install edging, an inch of bedding sand, and the pavers. Load wheelbarrow with sand. Dump sand. Spread sand with screed board. Load wheelbarrow with pavers. Lay pavers in running bond pattern, cutting as needed at the end of each run. Then repeat. Easy enough, right?
Five days. That’s how long it took. Five back breaking and very full days.
It is exhausting work. Your hands get beat up. Your back aches. It just seems to take forever to make noticeable forward progress. You start to regret taking this one on and consider your options for bringing in some hired talent to help you finish. But then you’re at the halfway mark and you think, “I can do this.” And eventually you’re done. Your body is completely broken and you’ve sacrificed the better part of three weekends for a glorified parking lot and you swear that you’ll never do that again, but you are done.
It was almost four years to the day that I finished that project. No, indeed, I have not forgotten that suffering. I am reliving it. Perhaps against my better judgment, I decided that the only proper way to upgrade our backyard was with a flagstone patio, at least in part. The patio is the final piece in a roughly two months long major backyard renovation project that also includes a ground level freestanding deck and a new garden area/field stone retaining wall.
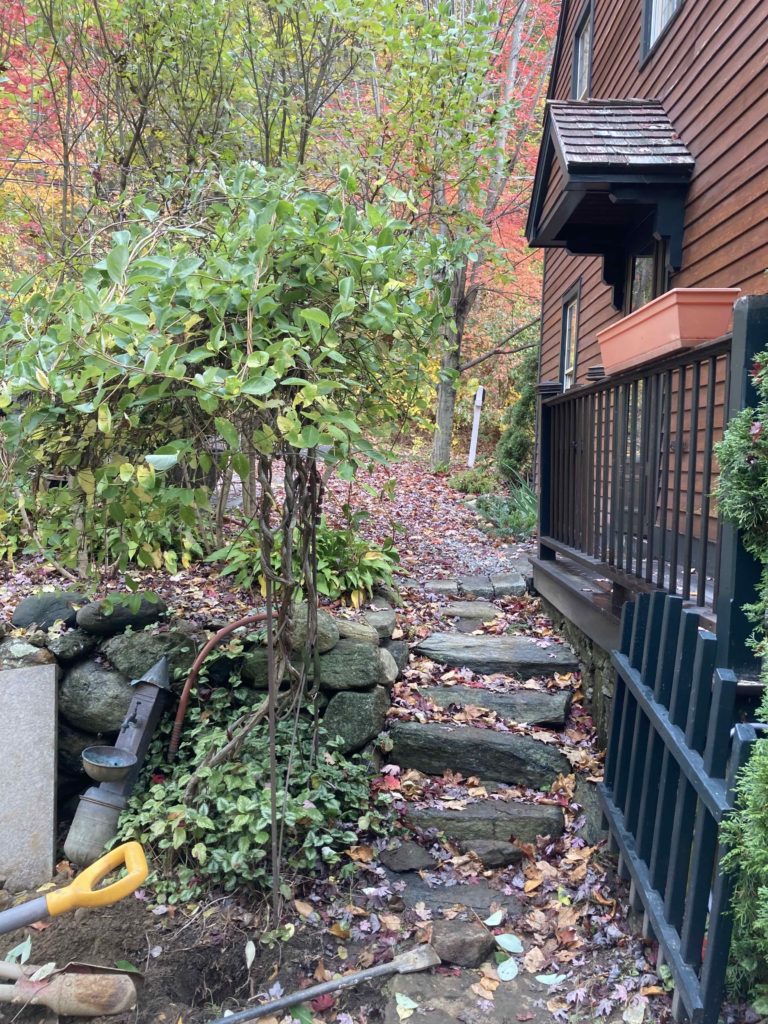
I really like mixed materials in landscapes. I certainly could have designed our deck in a way that obviated a patio, but it really wouldn’t have been the right design choice. There are field stone steps leading down to this small, but centrally located “hub” in our backyard. It is a transition point with the large, grassy part of the yard to one side, our guest cottage directly in front, and the new deck to the other side. Between the wood deck, the wood house siding, the wood cottage siding, the wood “porch” in front of the cottage, and a wood bridge there is a lot of wood in a relatively small area. Some stone would be a nice contrast and also a somewhat more practical installation given the existing grade in this particular spot. I had initially thought I would just throw down some pea gravel and call it done. I happened to have appropriate edging on three sides of the area to be hardscaped with deck skirt boards on two sides and a field stone garden border on the third. This would have been a very easy and somewhat acceptable approach.
A pea gravel patio is very classic and works quite well for more casual, rustic applications. But this is a spot that is pretty trafficked and I had little doubt that pea gravel would eventually migrate all over the yard. Then I thought, well, maybe I could do a flagstone and pea gravel patio, so I don’t need to worry about getting really tight joints between the flagstone. But the more I thought about that approach, the more I just felt like it was neither here nor there and I would regret it. The was only one logical conclusion. I had to do it the “right” way, which, of course, is the hard way.
Here’s how it went down:
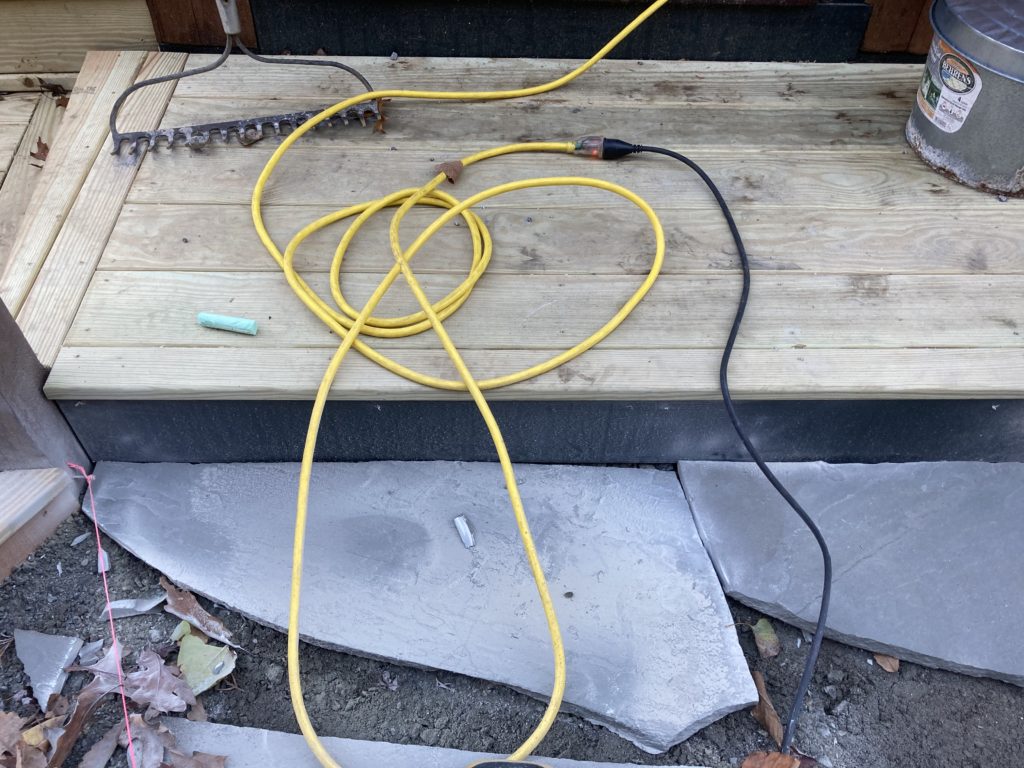
Day 1 (about 4 hours): Dig. I needed to excavate about 6 inches from a roughly 120sf area. I don’t really remember when I actually did this. Sometime in mid-October, I suspect. I had the flagstone (referred to as “irregular” stone in my neck of the woods) and aggregate delivered on Oct 17th and I can see from photos that I started working on this in earnest Nov 1st. I went with bluestone principally because my wife preferred it to the irregular quartz that was the alternative at my local stone yard. Bluestone is classic, and although not truly local to my area in CT, this bluestone probably had to travel only 100 miles or so to get here from somewhere in the Catskills area of NY, so yeah for keeping those embodied carbon emissions of trucking heavy building materials on the low end.
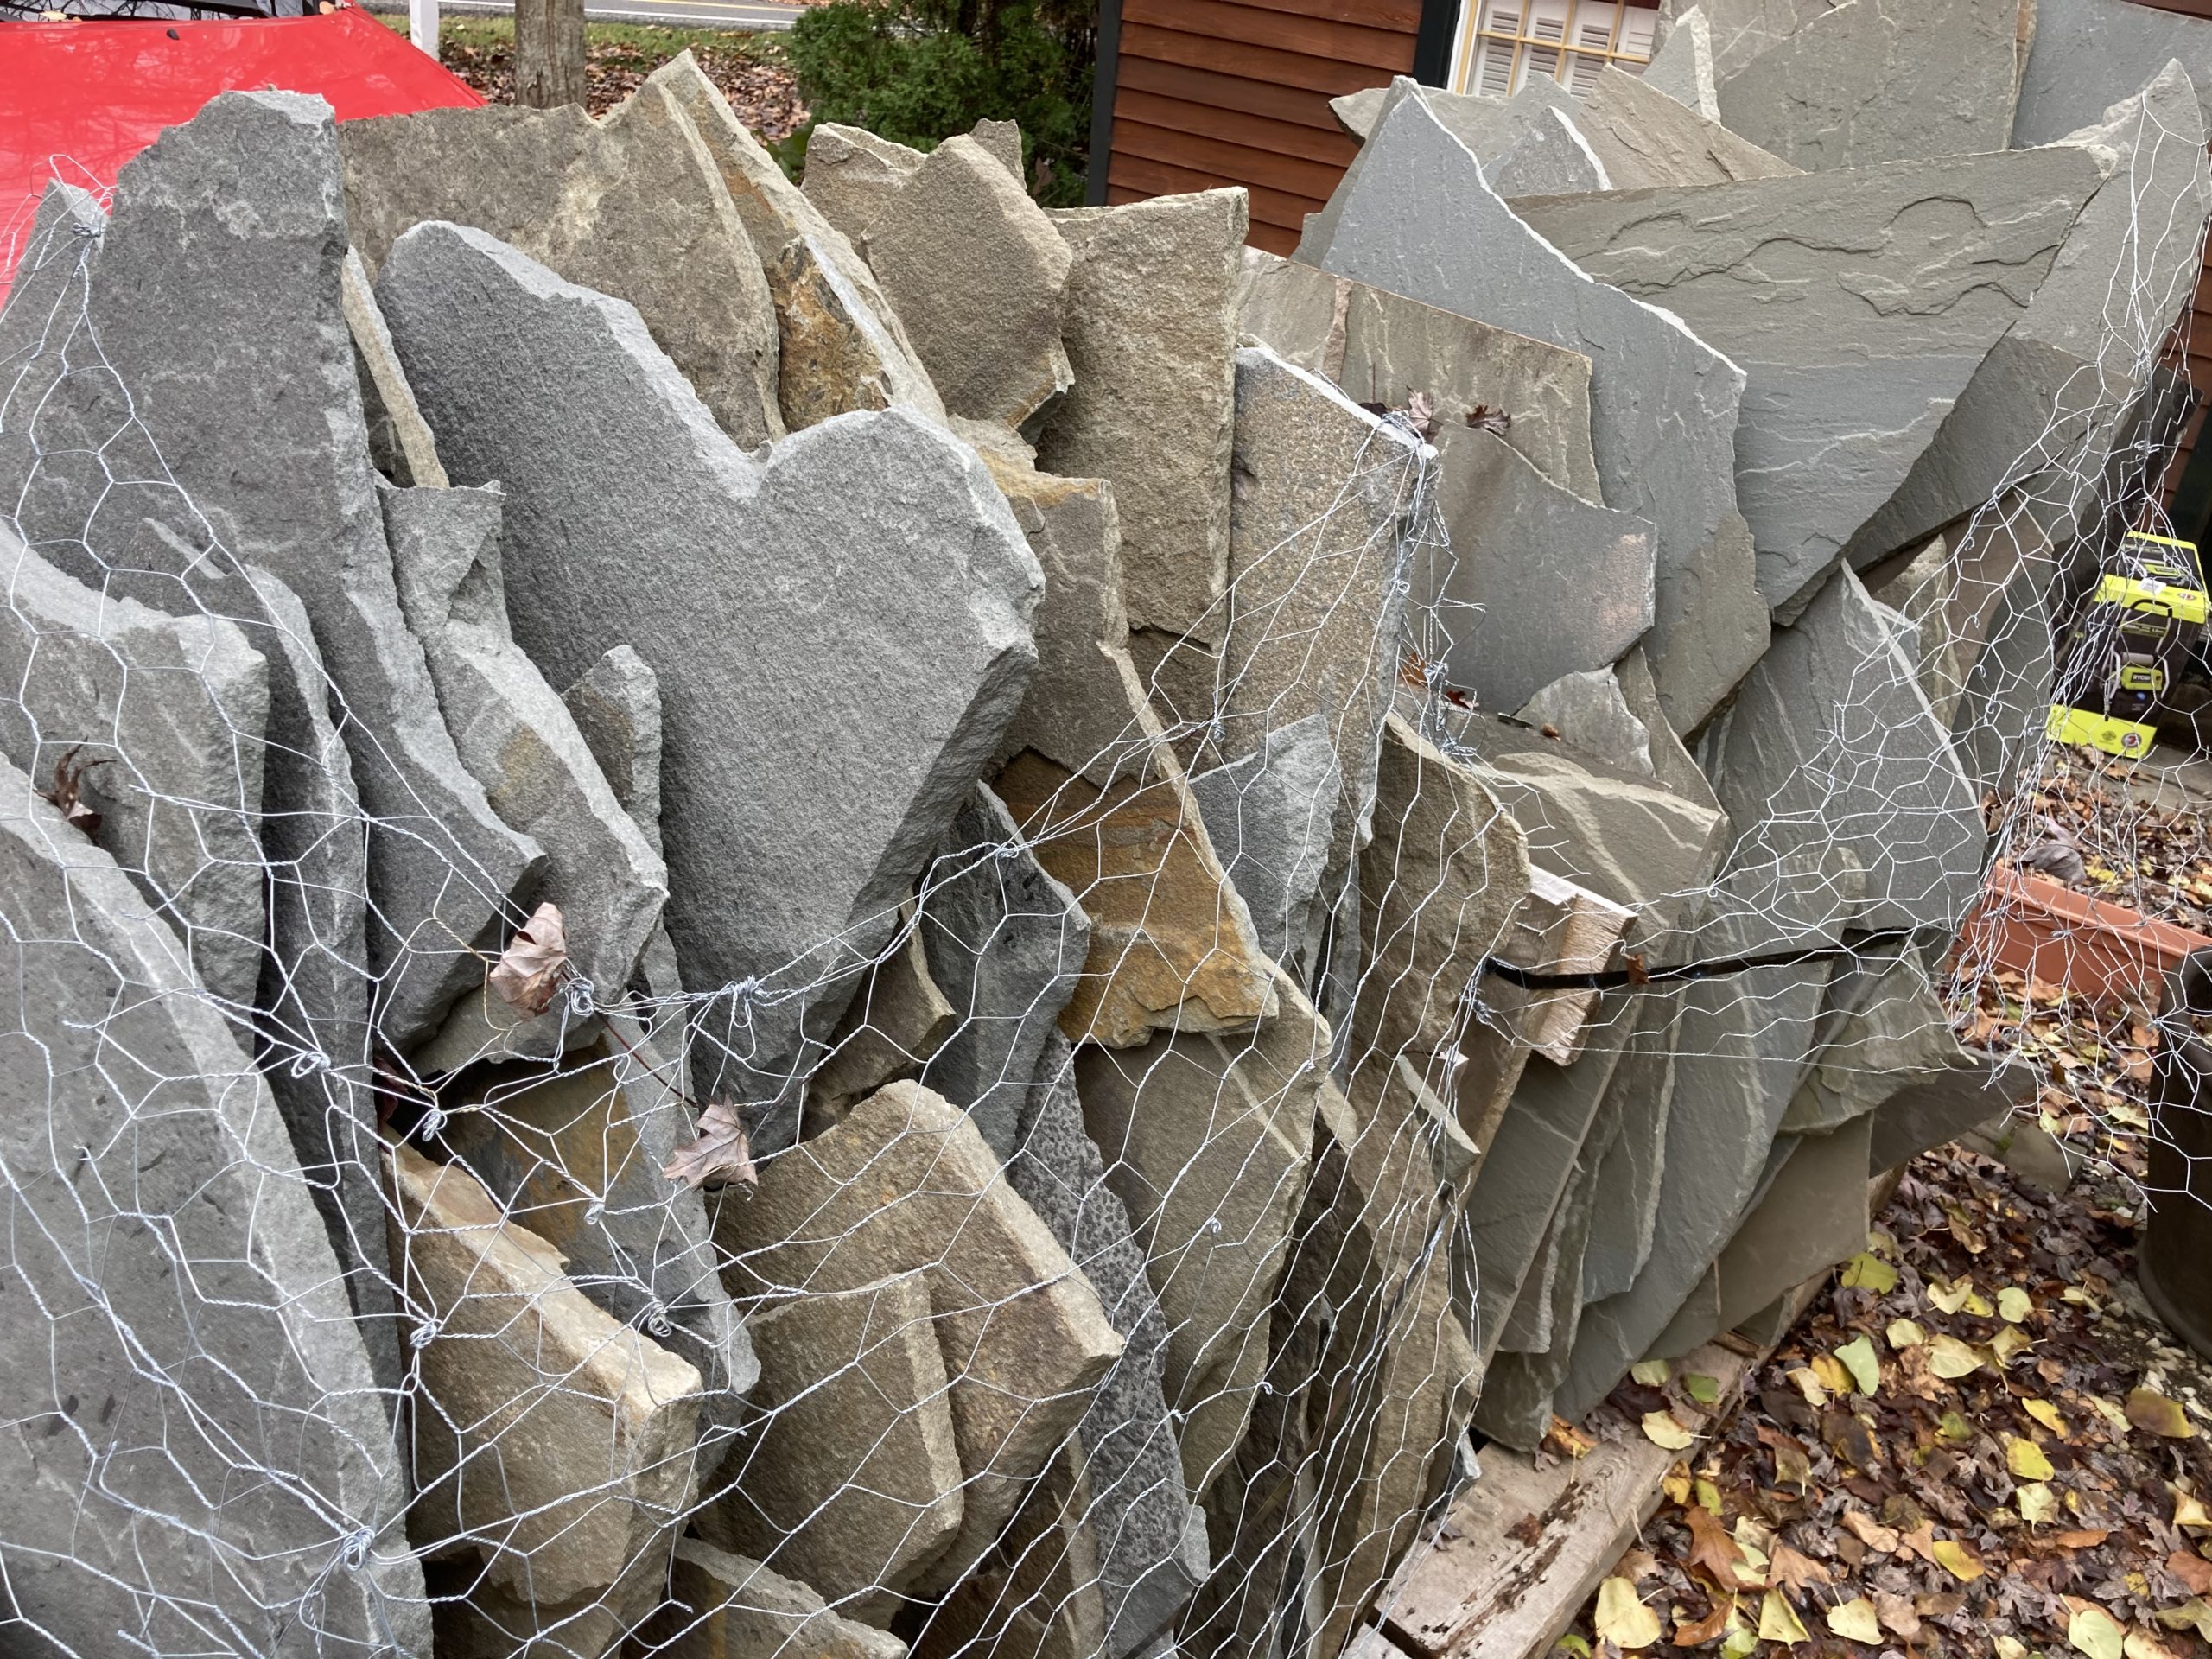
For some reason I got distracted from the patio and put in a bit of time on some other projects between mid-Oct and Nov 1. But I eventually ran out of distractions and had to face the music. I had two pallets of stone occupying prime driveway real estate and my wife had thus far not shown any appetite for turning them into a patio. She evidently thought that I, being the one that had ordered said stone, would also be the one to do something with it.
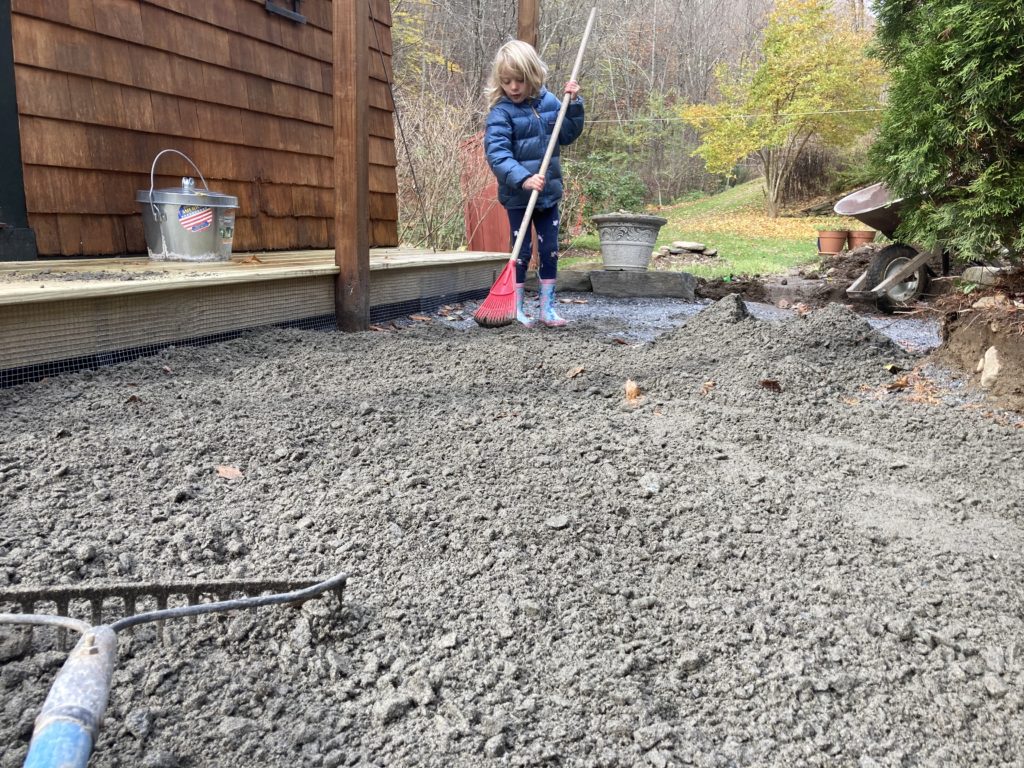
Day 2 (about 4 hours): Wait. Hold on. Child labor to the rescue. Having excavated and then tamped down the patio area, I began hauling wheelbarrow loads of “processed” aggregate, which my 5 year old daughter was so gracious to help spread. The aggregate is 3/4 inch gravel mixed with stone dust, which makes it very compactable, if that is a word. You do 2-inch layers, tamping each layer down. I used a hand tamper, but for a larger project area renting a plate compactor is definitely the way to go. Also, I did put down a layer of landscape fabric between the soil and the aggregate, but I didn’t have enough on hand to completely cover the area and I don’t think it was even necessary to do so.
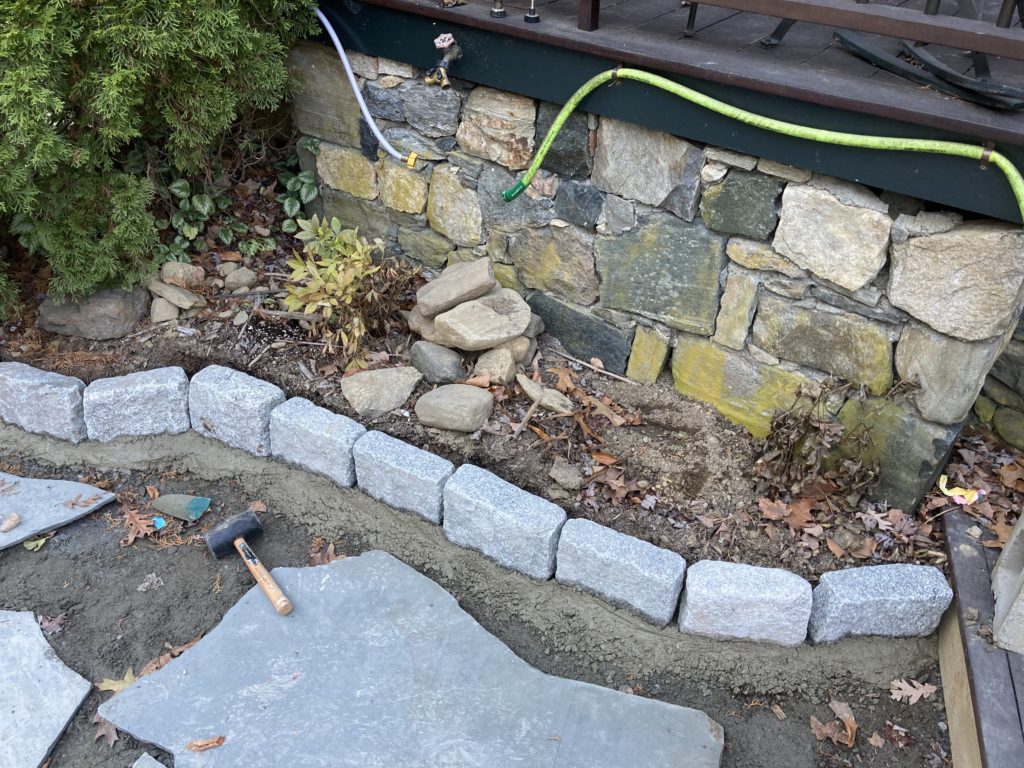
Day 3 (about 2 hours): I needed to deal with the edge of this small garden bed. It was previously defined by field stone simply embedded in the dirt, but the finished grade of the patio would be about 4 inches below the top of the bed. This tiny little patio area had some pretty aggressive slope, which was one of the reasons I wanted to improve it. But taking the grade down on the high side of the area meant that I needed to do two things: First, I would need to add a new step. Second, was this border.
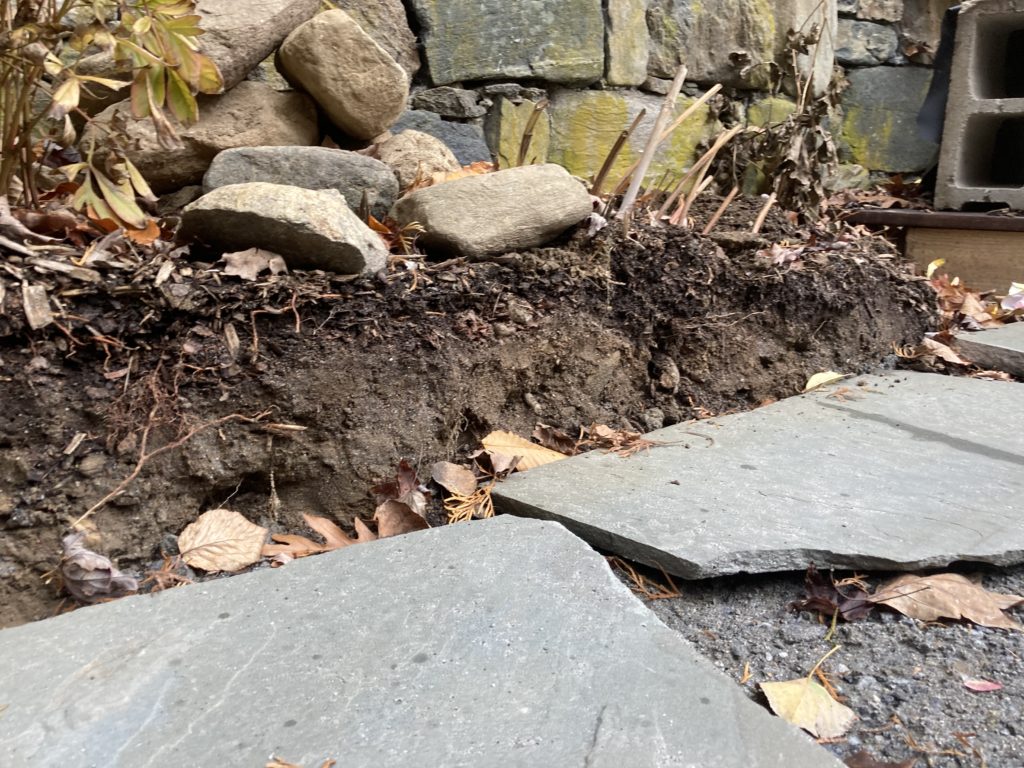
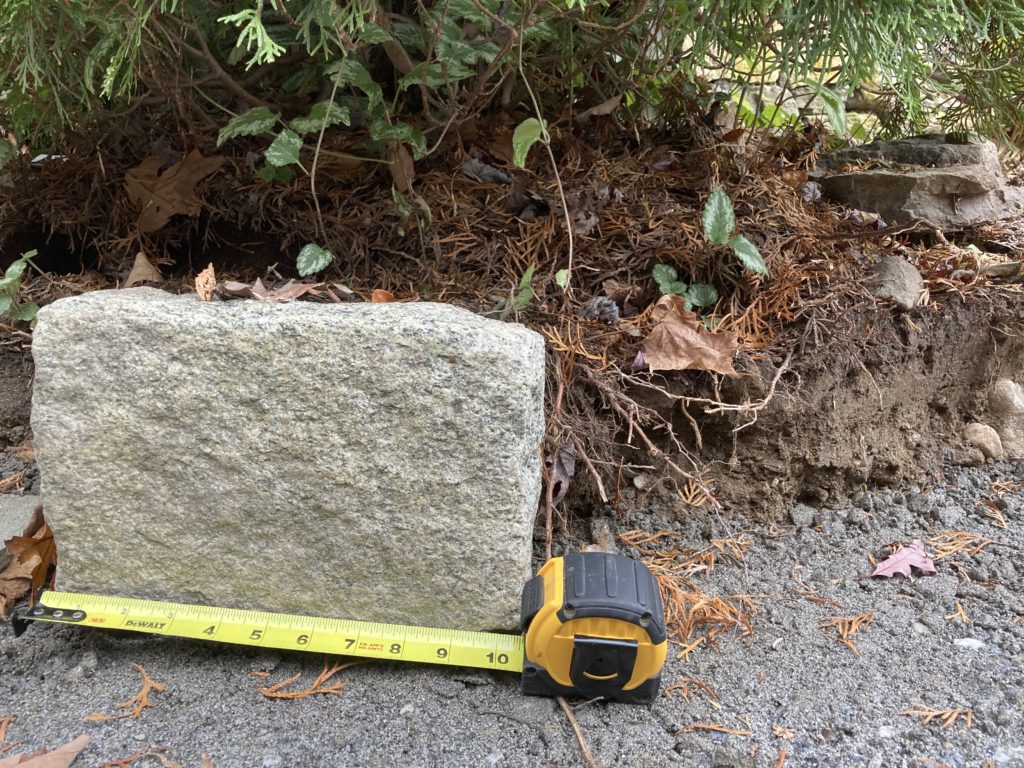
I had initially thought I would just build up a field stone border, but finding the right combination of stones was going to be tricky and time consuming. Instead, I decided to use Belgian block (also often referred to as cobblestone).
The morning of election day I drove down to my local stone yard and ran my idea by the guy that runs the place. He suggested setting the stones in a 2-3″ bed of concrete, so I came home with enough Belgian block for 20 linear feet and two bags of concrete.
I don’t think I actually did any additional work on election day since I was probably too busy obsessively reading news coverage.
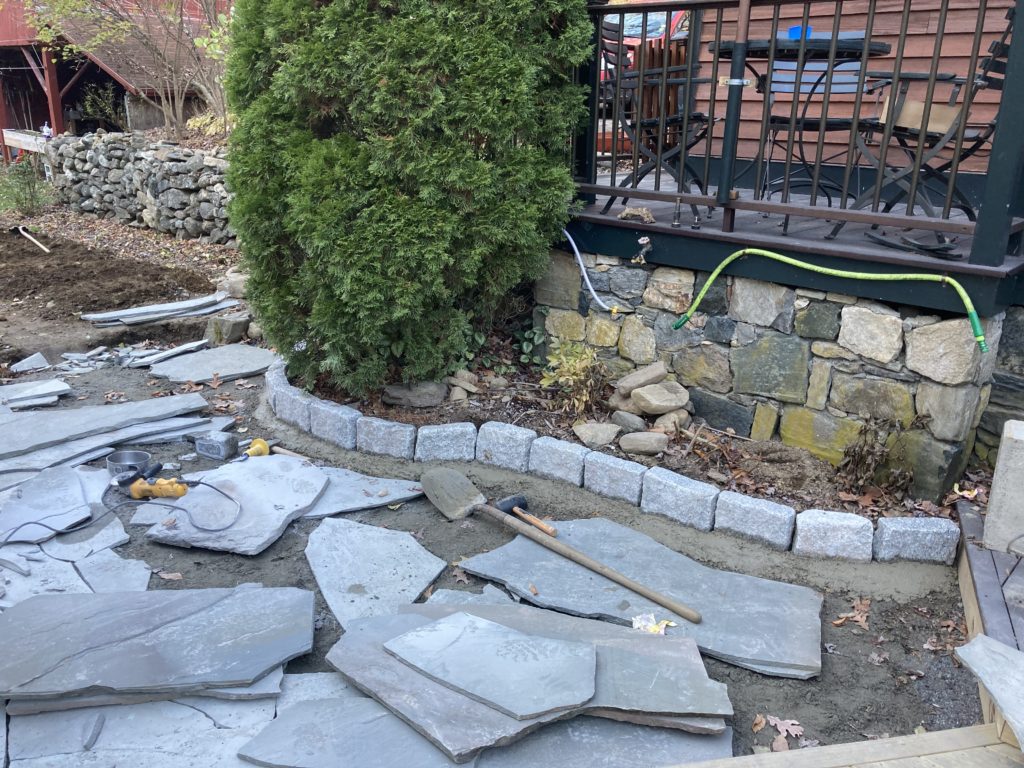
Days 4 and 5 (about 8 hours total): The weather wasn’t favorable for concrete (too cold at night) so I began laying out stones.
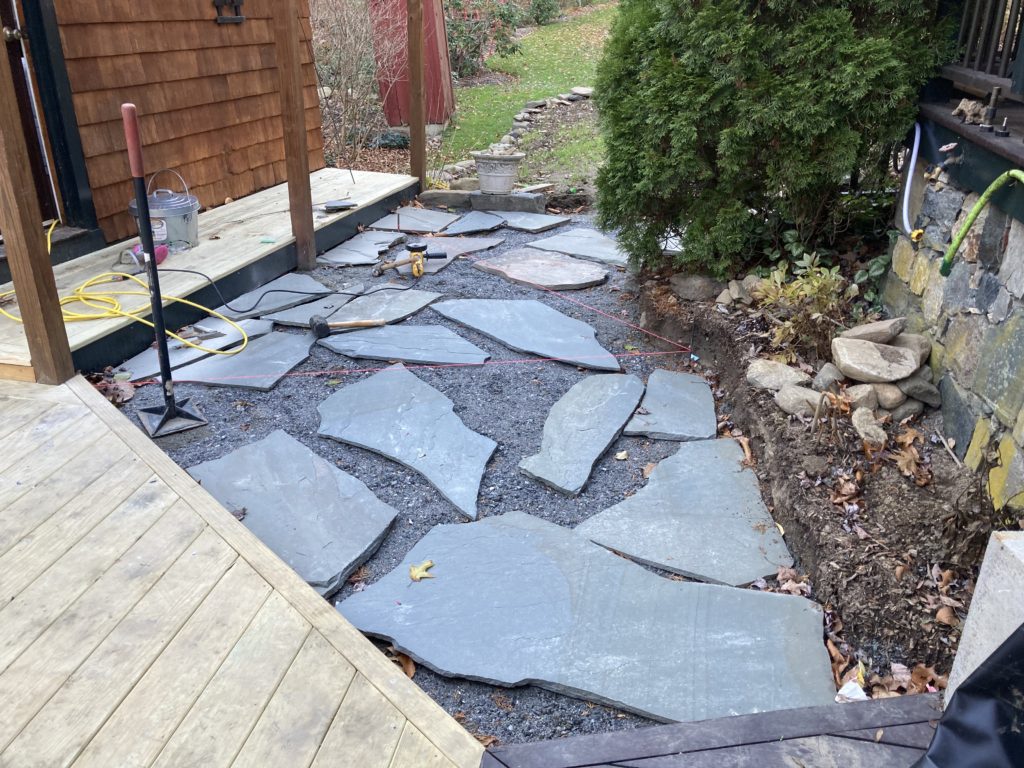
I suppose there are two different approaches to setting your stones. You could put down your bedding layer (typically sand or stone dust) all at one time or in sections, then cut and lay your stones, leveling each stone as you go. I thought that would be a recipe for failure since the area I was working in was so tight that I imagined my bedding layer getting completely trashed by all of the foot traffic and moving and cutting of stone. I thought it would be a better approach to lay out most of the patio, cut a bunch of stone, then remove the cut stones from the work area, put down the stone dust bedding layer, then set and level the cut stones. More on these latter steps below.
I started by looking for large stones with a long straight edge which I could use against the skirt boards of the deck. Then I roughly arranged them in ways that would minimize waste. At first I was being really particular but began to feel like I was wasting a lot of time trying to find the perfect layout that would yield as little waste as possible. But that involved moving lots of heavy flagstone and as I worked through the project I realized I had plenty of stone to spare and it really wasn’t too much effort to simply cut stones to fit instead of trying to match the edges of two different stones.
Cutting the bluestone to fit is pretty straightforward. I used an angle grinder with a diamond blade, a masonry chisel and a 3 lb club hammer.
Here is the basic process:
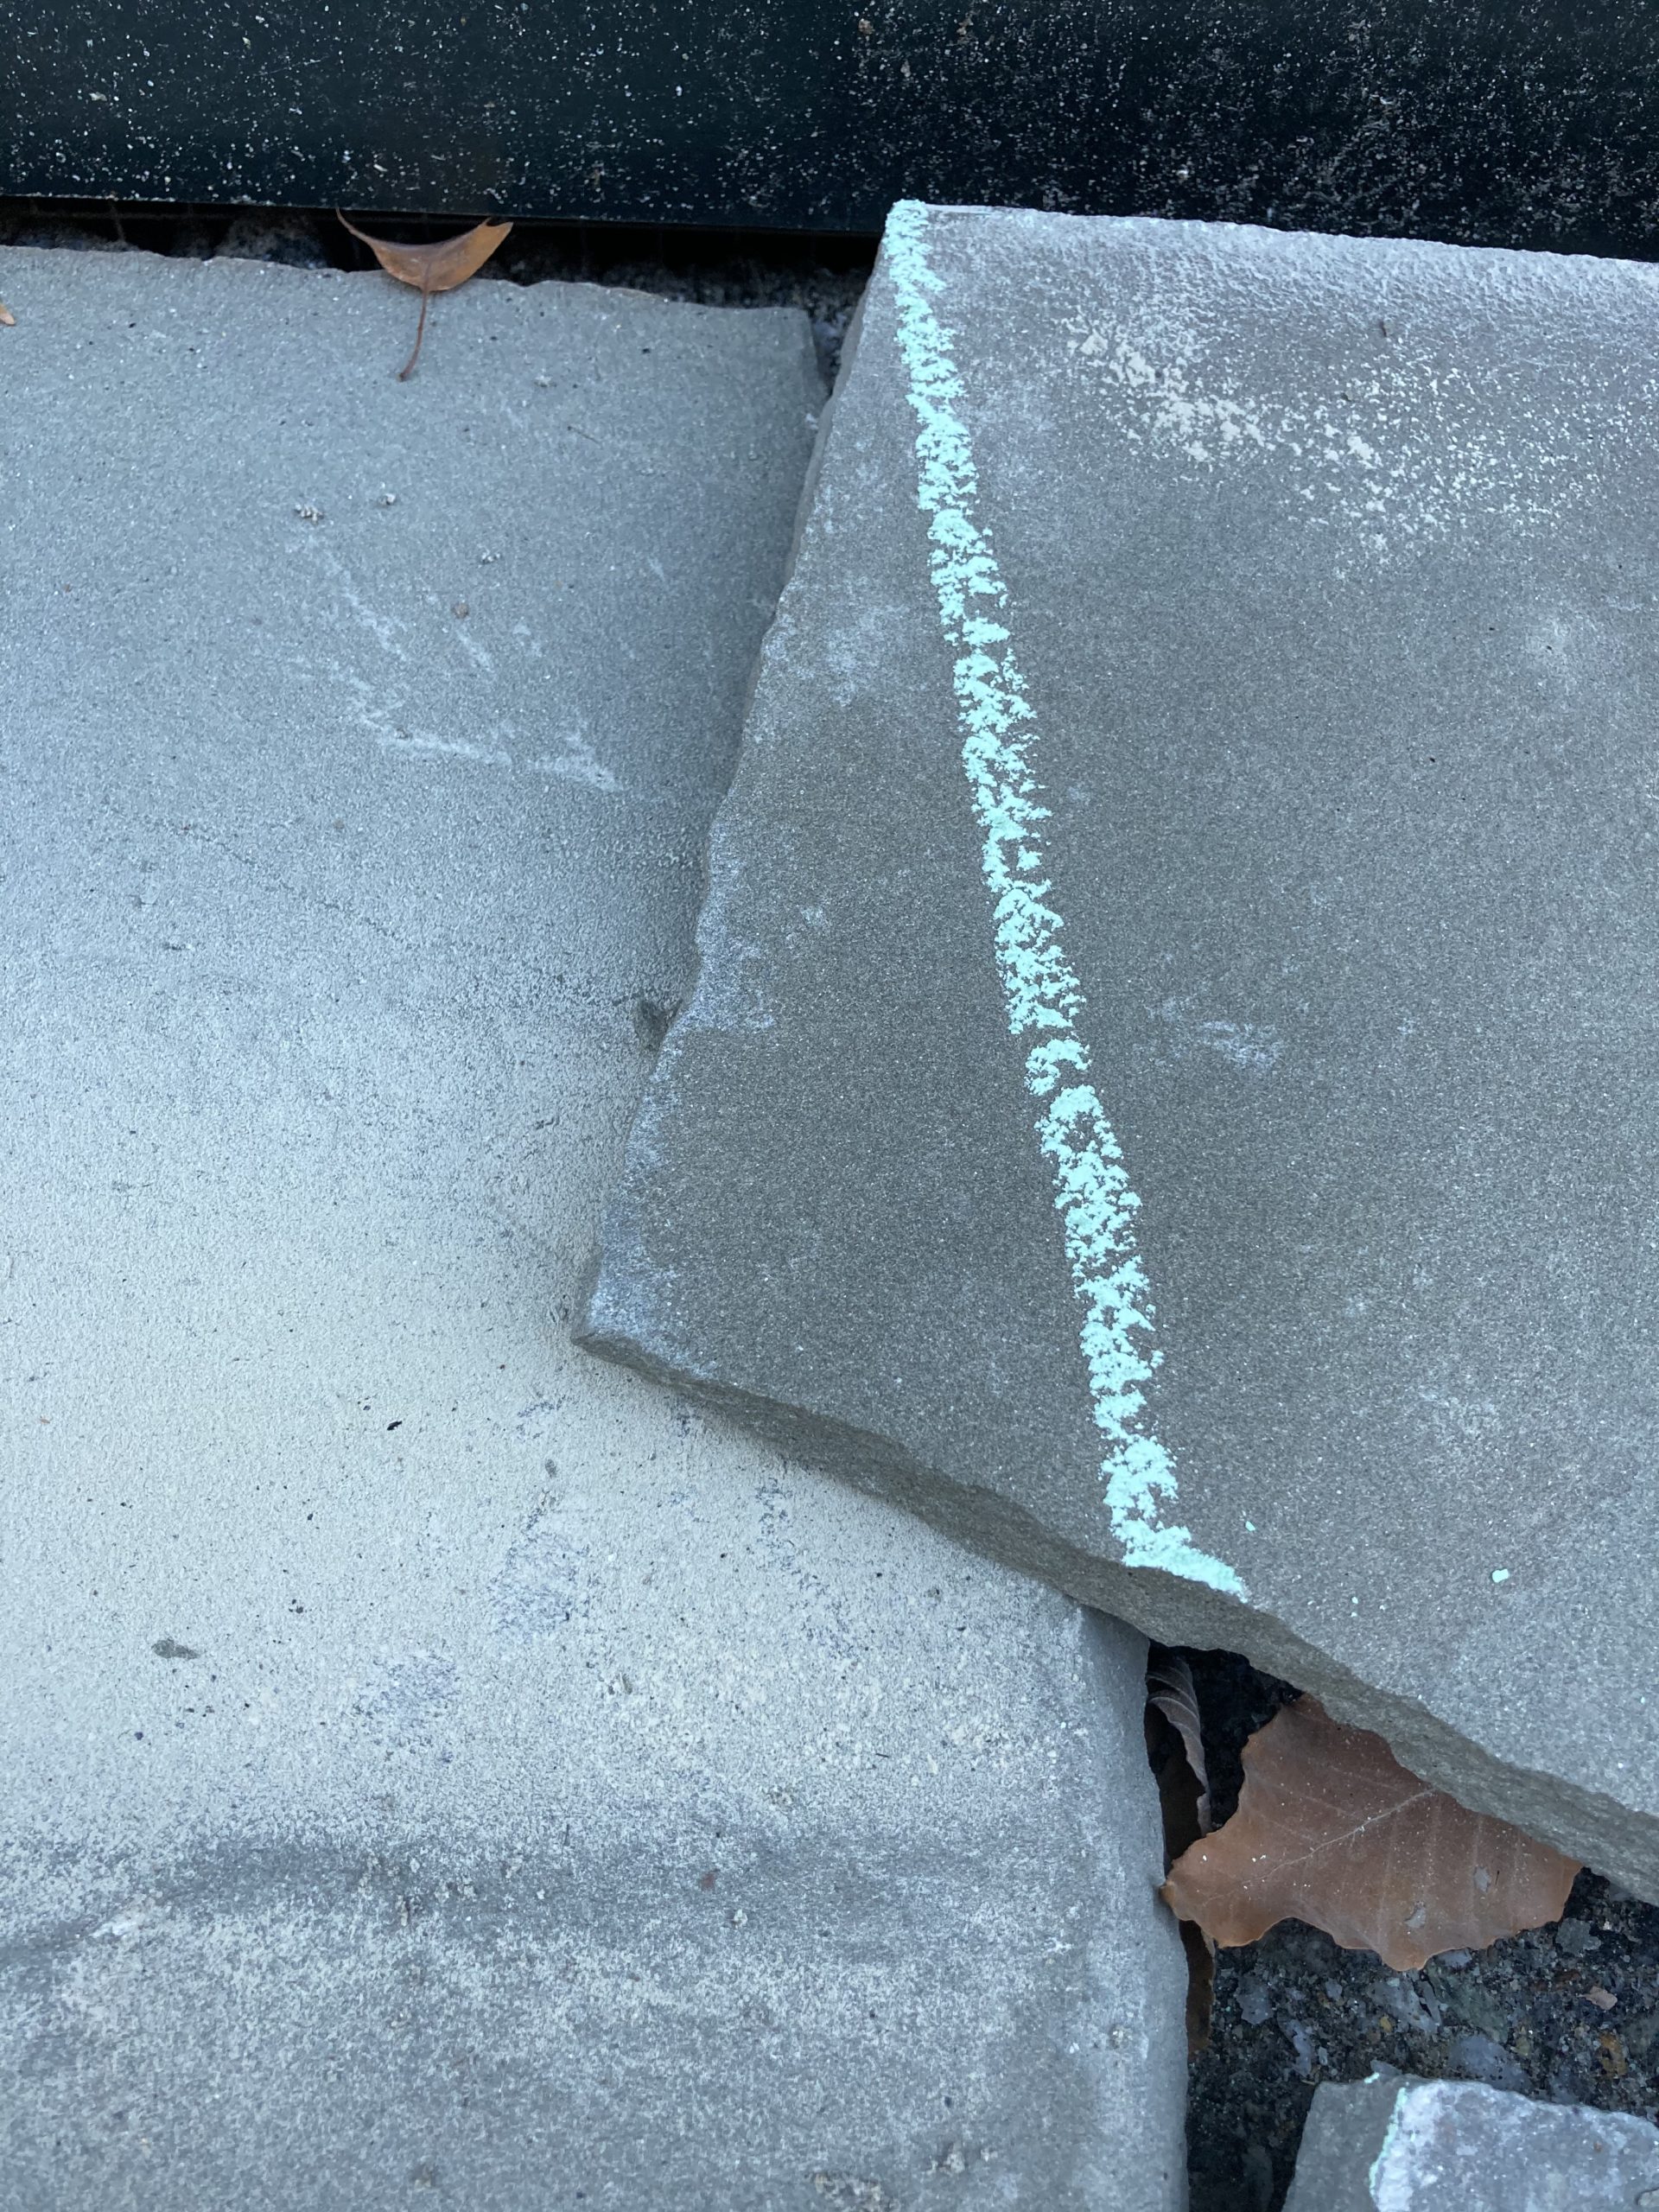
Mark your cut. I sometimes used chalk but often just scored the stone with the angle grinder.
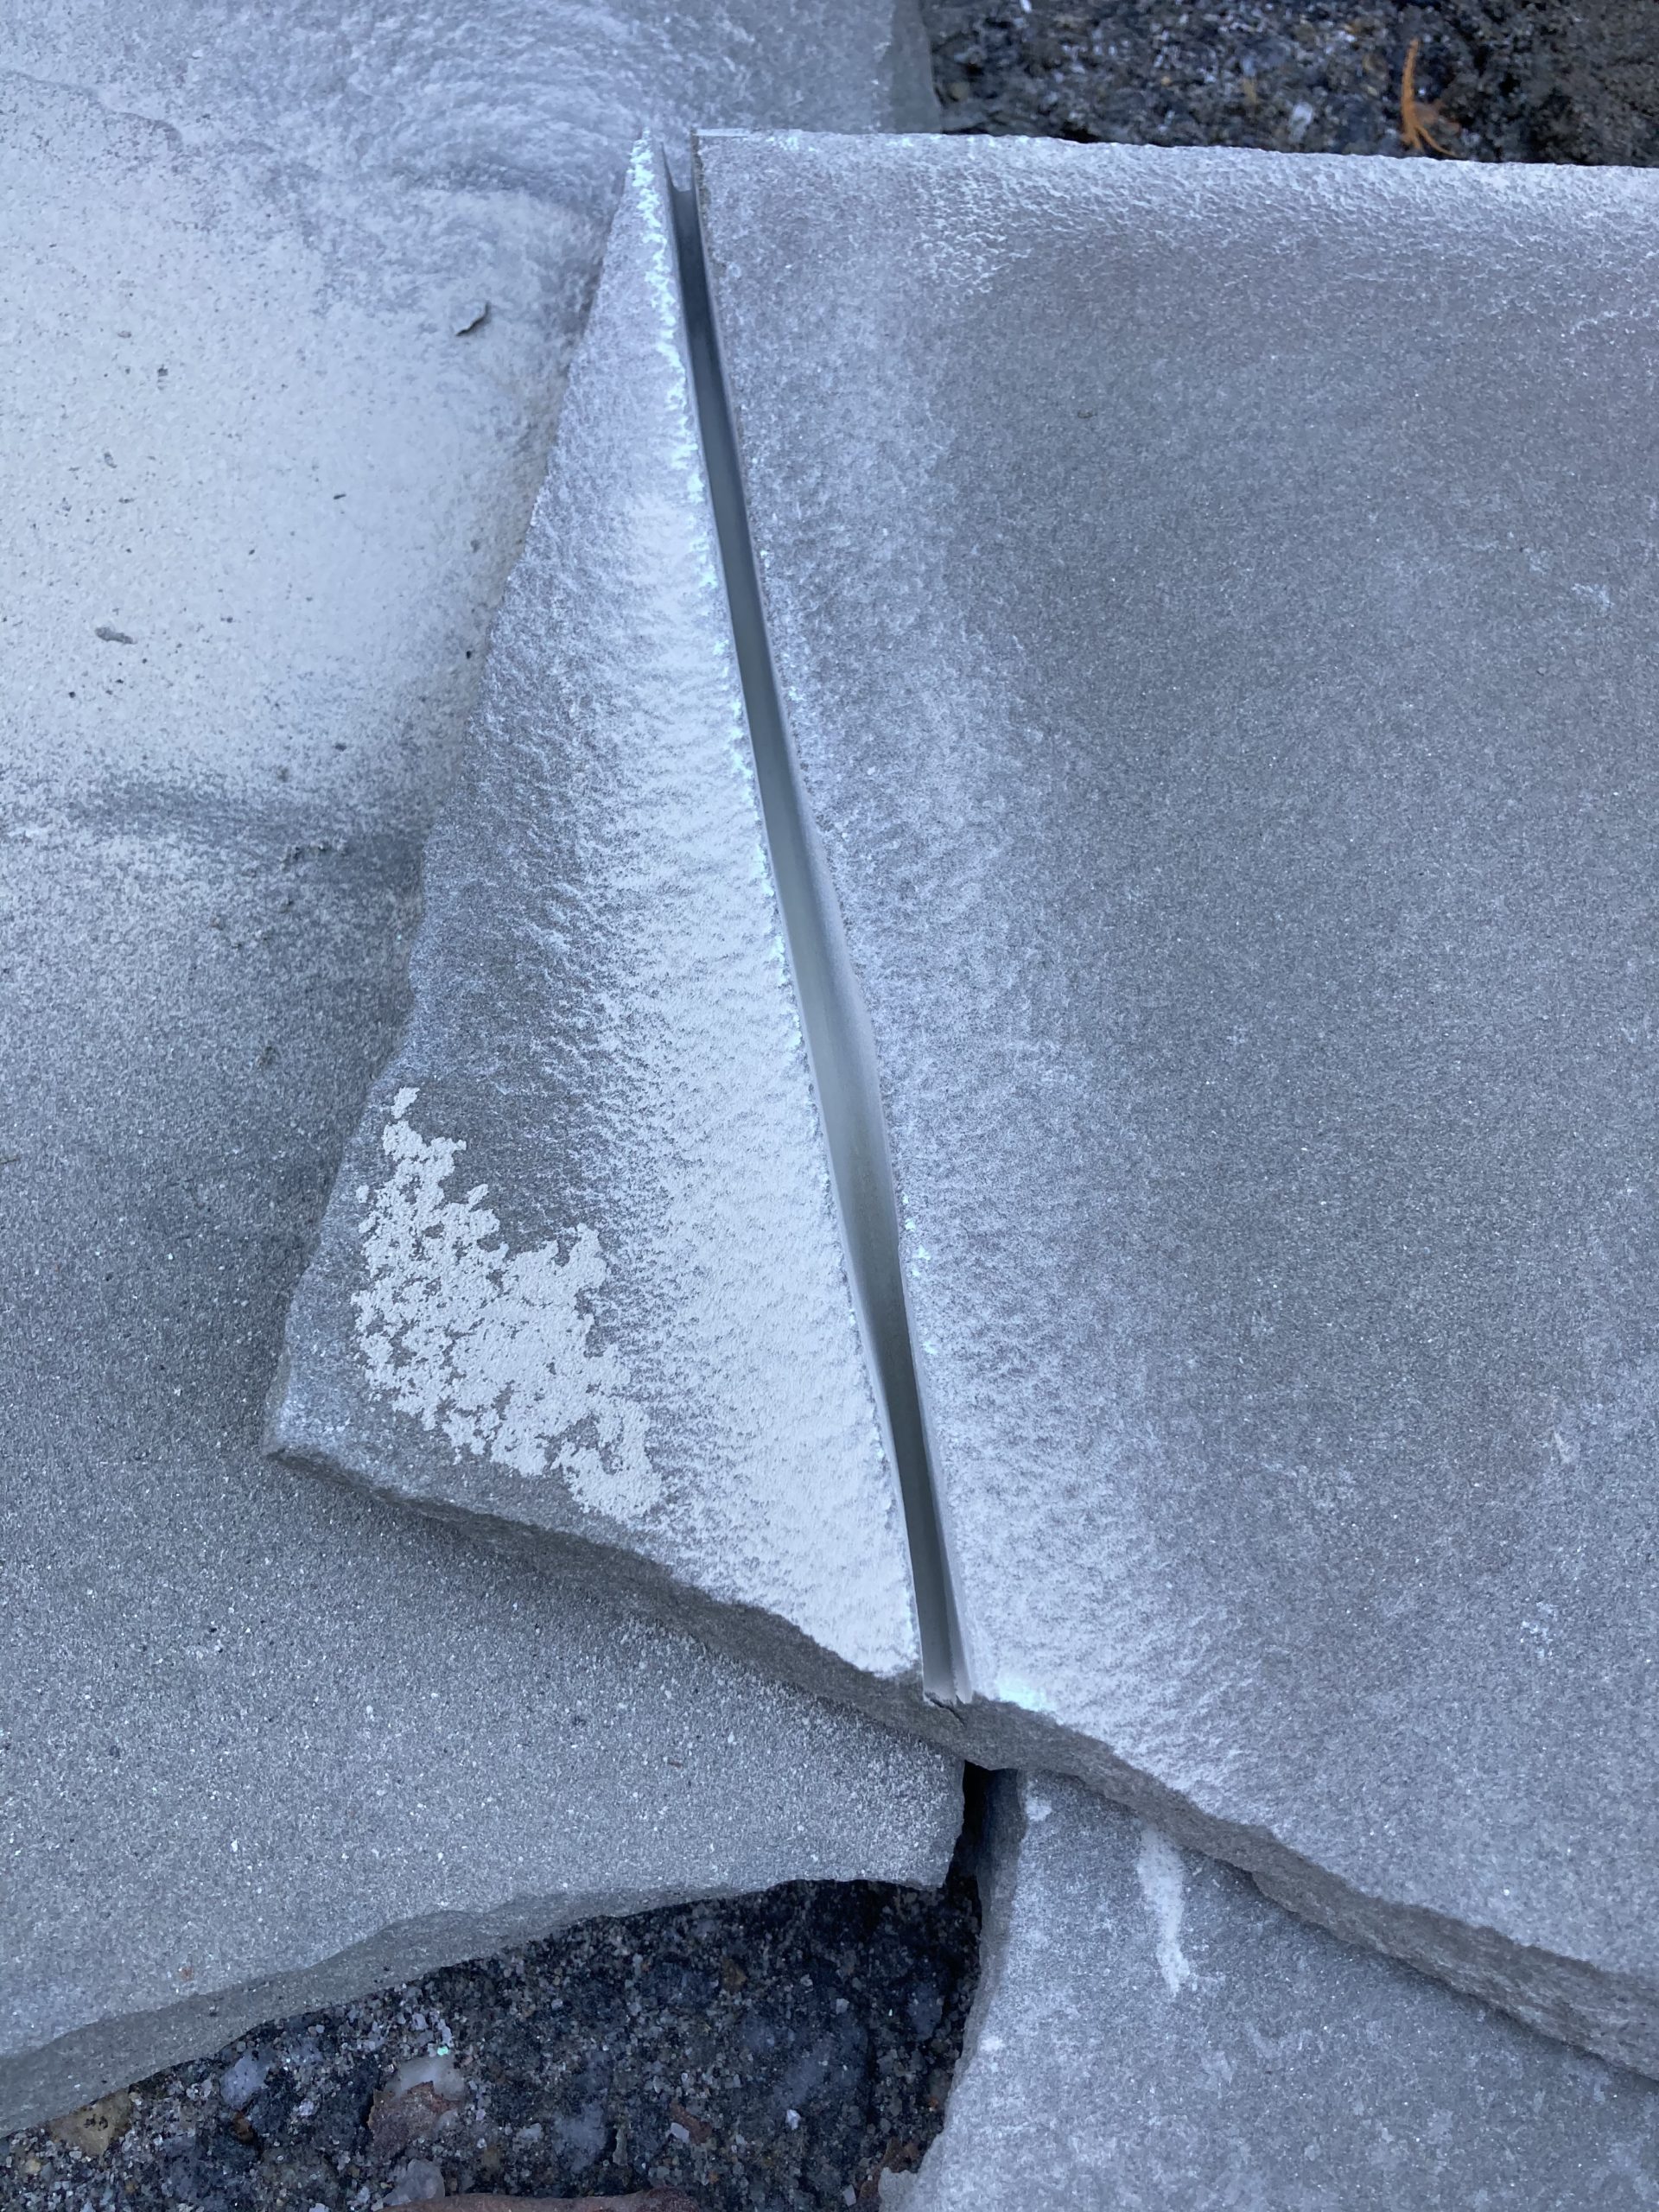
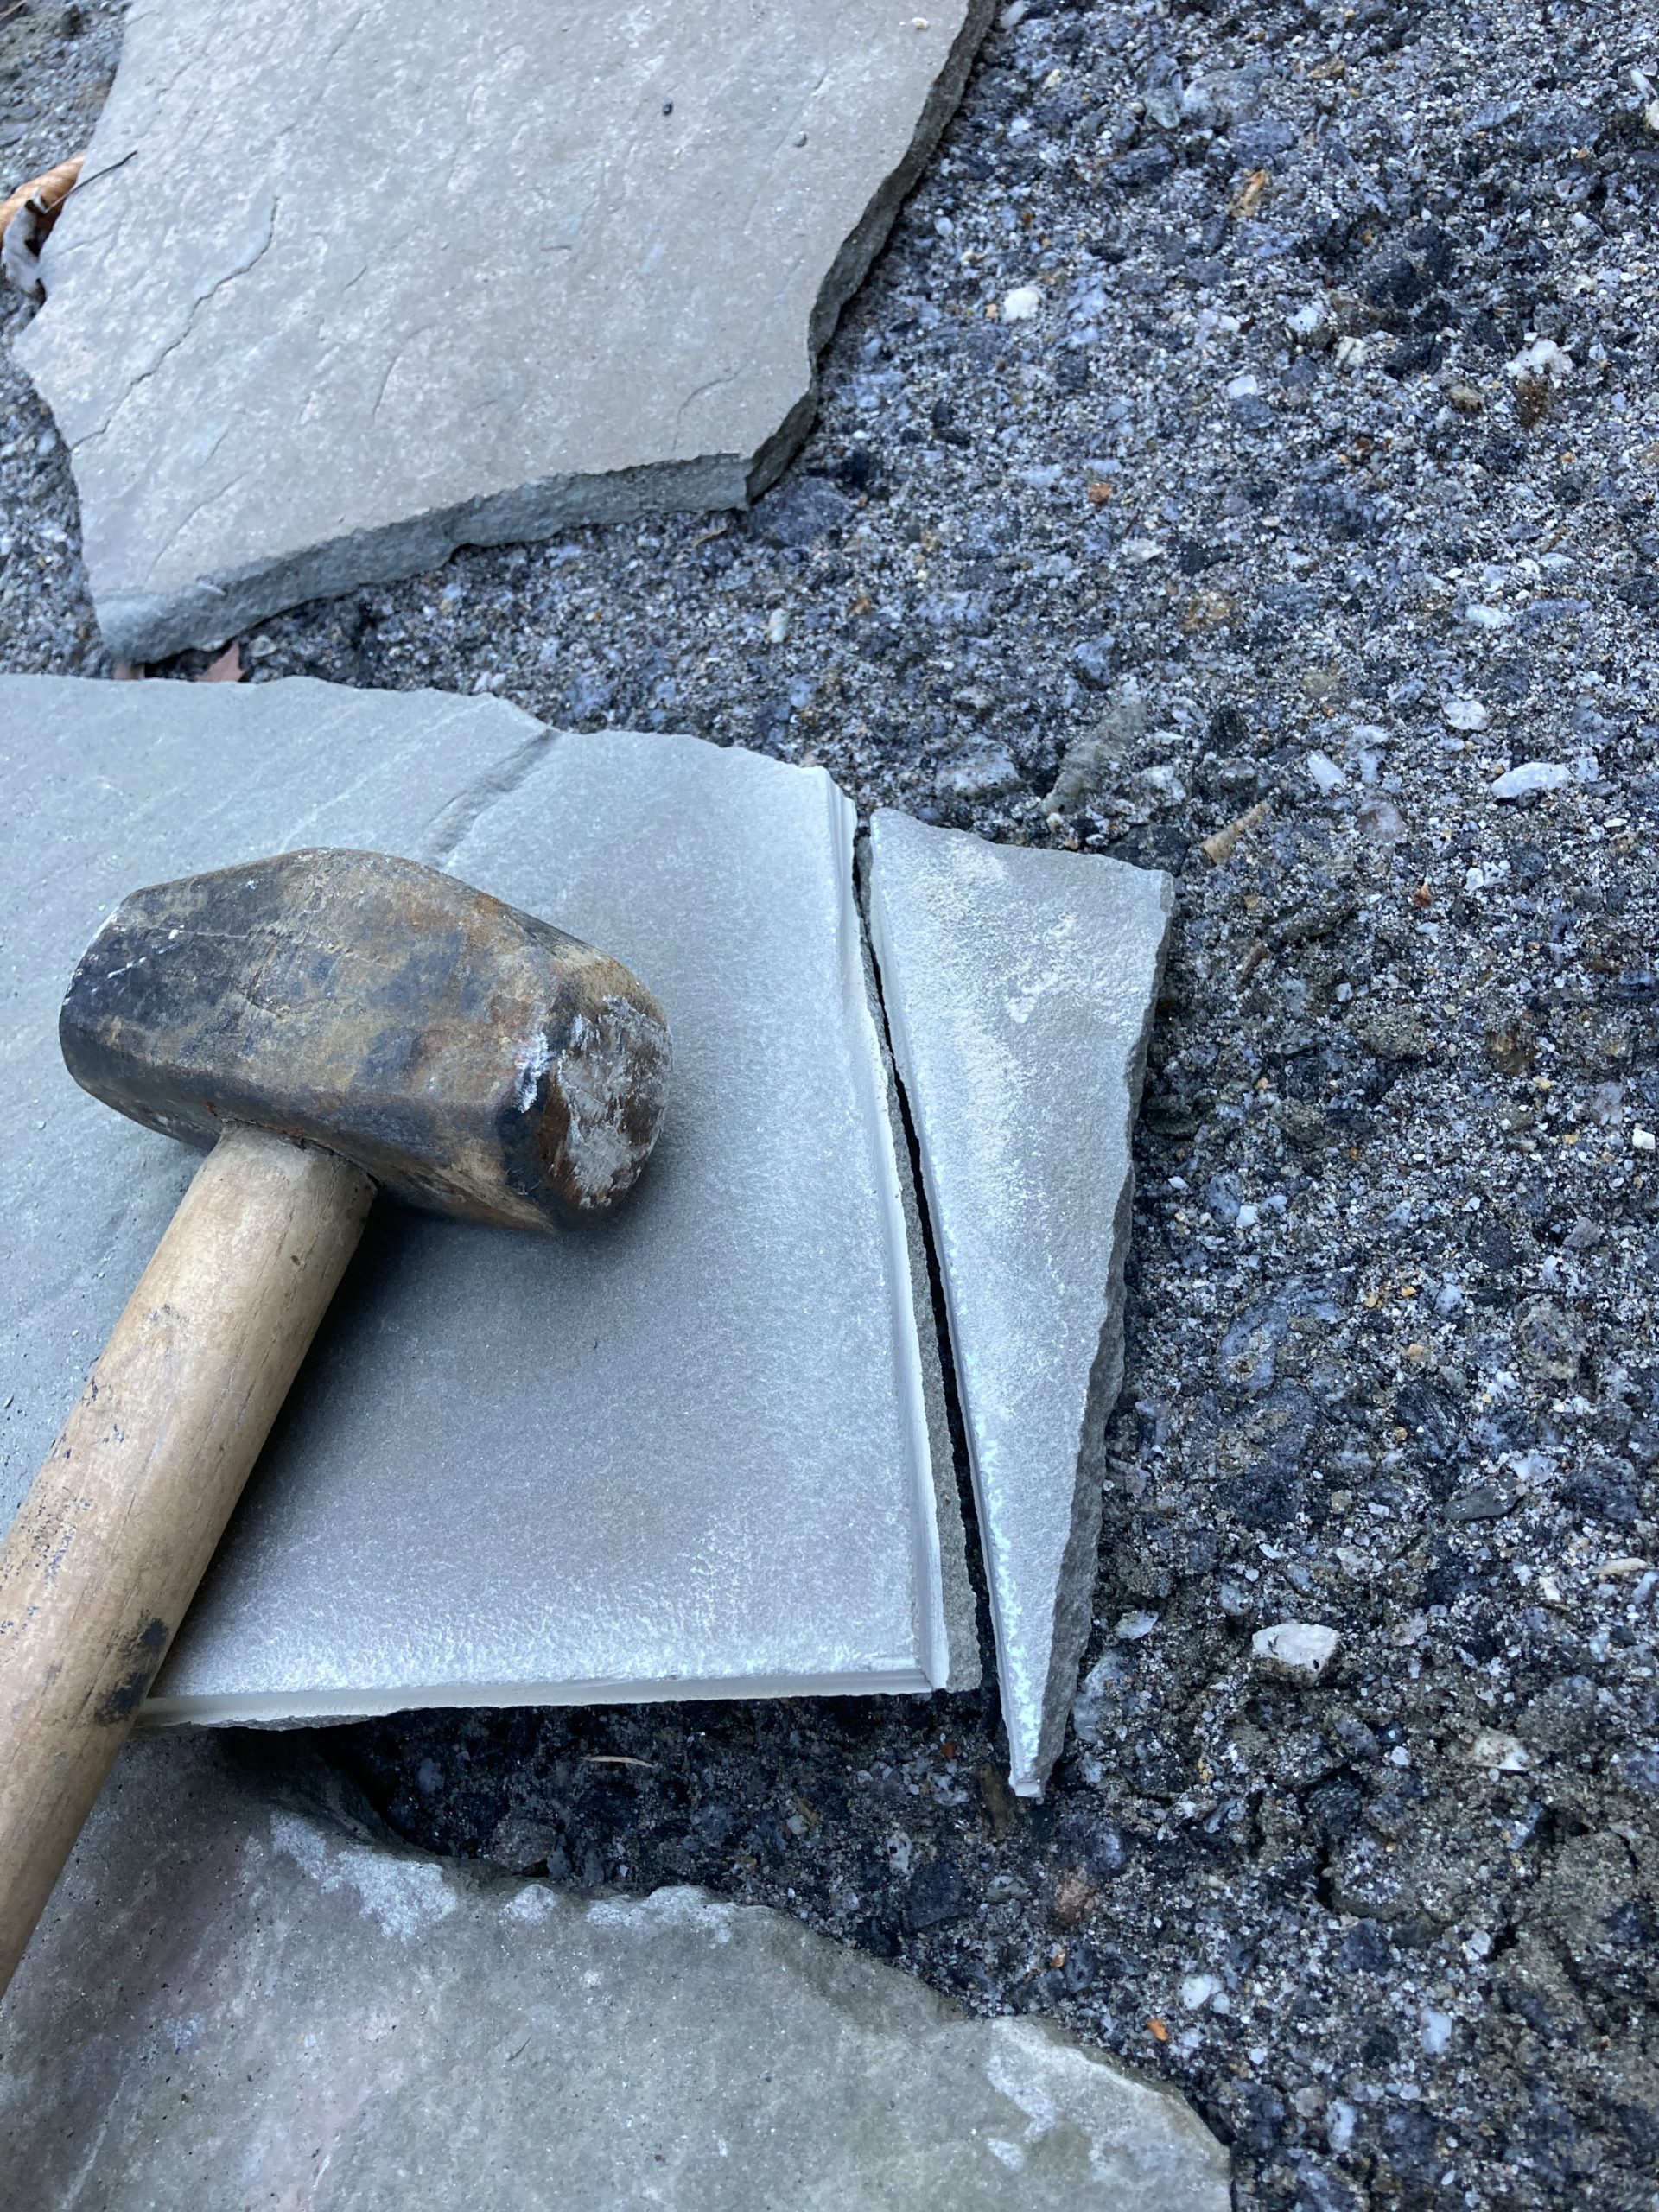
It took me about a half a dozen or so stones before I felt really comfortable with the process. I definitely had a number of stones break in places I didn’t want. This happened typically when I failed to cut deep enough into the stone. Bluestone is a sedimentary rock formed by the compression of different layers. It isn’t always obvious where those layers are until you’ve cut the stone so sometimes you think you’ll get a nice clean break but the stone fractures along one of those “hidden” layers. Oh well. Even when a stone broke in an unexpected way I was almost always able to make it work somewhere else in my design without a whole lot of headache or waste. With time I was able to get a little better about “reading” each stone and making good decisions about how to use or cut it. For example, I learned that it was best to avoid layouts that would require a stone cut to a narrow point. These sort of narrow triangular pieces were super prone to breaking. And if I couldn’t avoid that situation, I wanted to use as large and thick a stone as possible.
I didn’t cut all of the bluestone before actually setting it in a bedding layer and leveling the finished patio, but I cut about 80% leaving the area where I needed to install my Belgian block border for the future. This was some really dusty work, and loud, so wearing a respirator, and hearing and eye protection, is essential. Knee pads, too.
Day 6 (about 4 hours): With temps forecast to be between 50 and 65 for the next couple of days I decided it was as good a time as any to lay my Belgian block border. I mixed up some concrete and set a row of blocks in a 2-3 inch bed.
I try to avoid concrete whenever possibly because of the crazy, huge embodied energy associated with concrete production. It’s really just about the worst thing for the environment you can find in the building industry, but I needed a way to hold the blocks in place and a couple of 80lb bags of concrete is quite trivial. Some back of the napkin math indicates there were about 6lbs of CO2 emissions associated with the two 80lb bags of concrete I used. Just one of the dozens of trees I planted this spring absorbs about twice that amount annually, so I’m okay with my carbon footprint in this application of concrete. The use of concrete alternatives is a topic I plan on coming back to in the future.
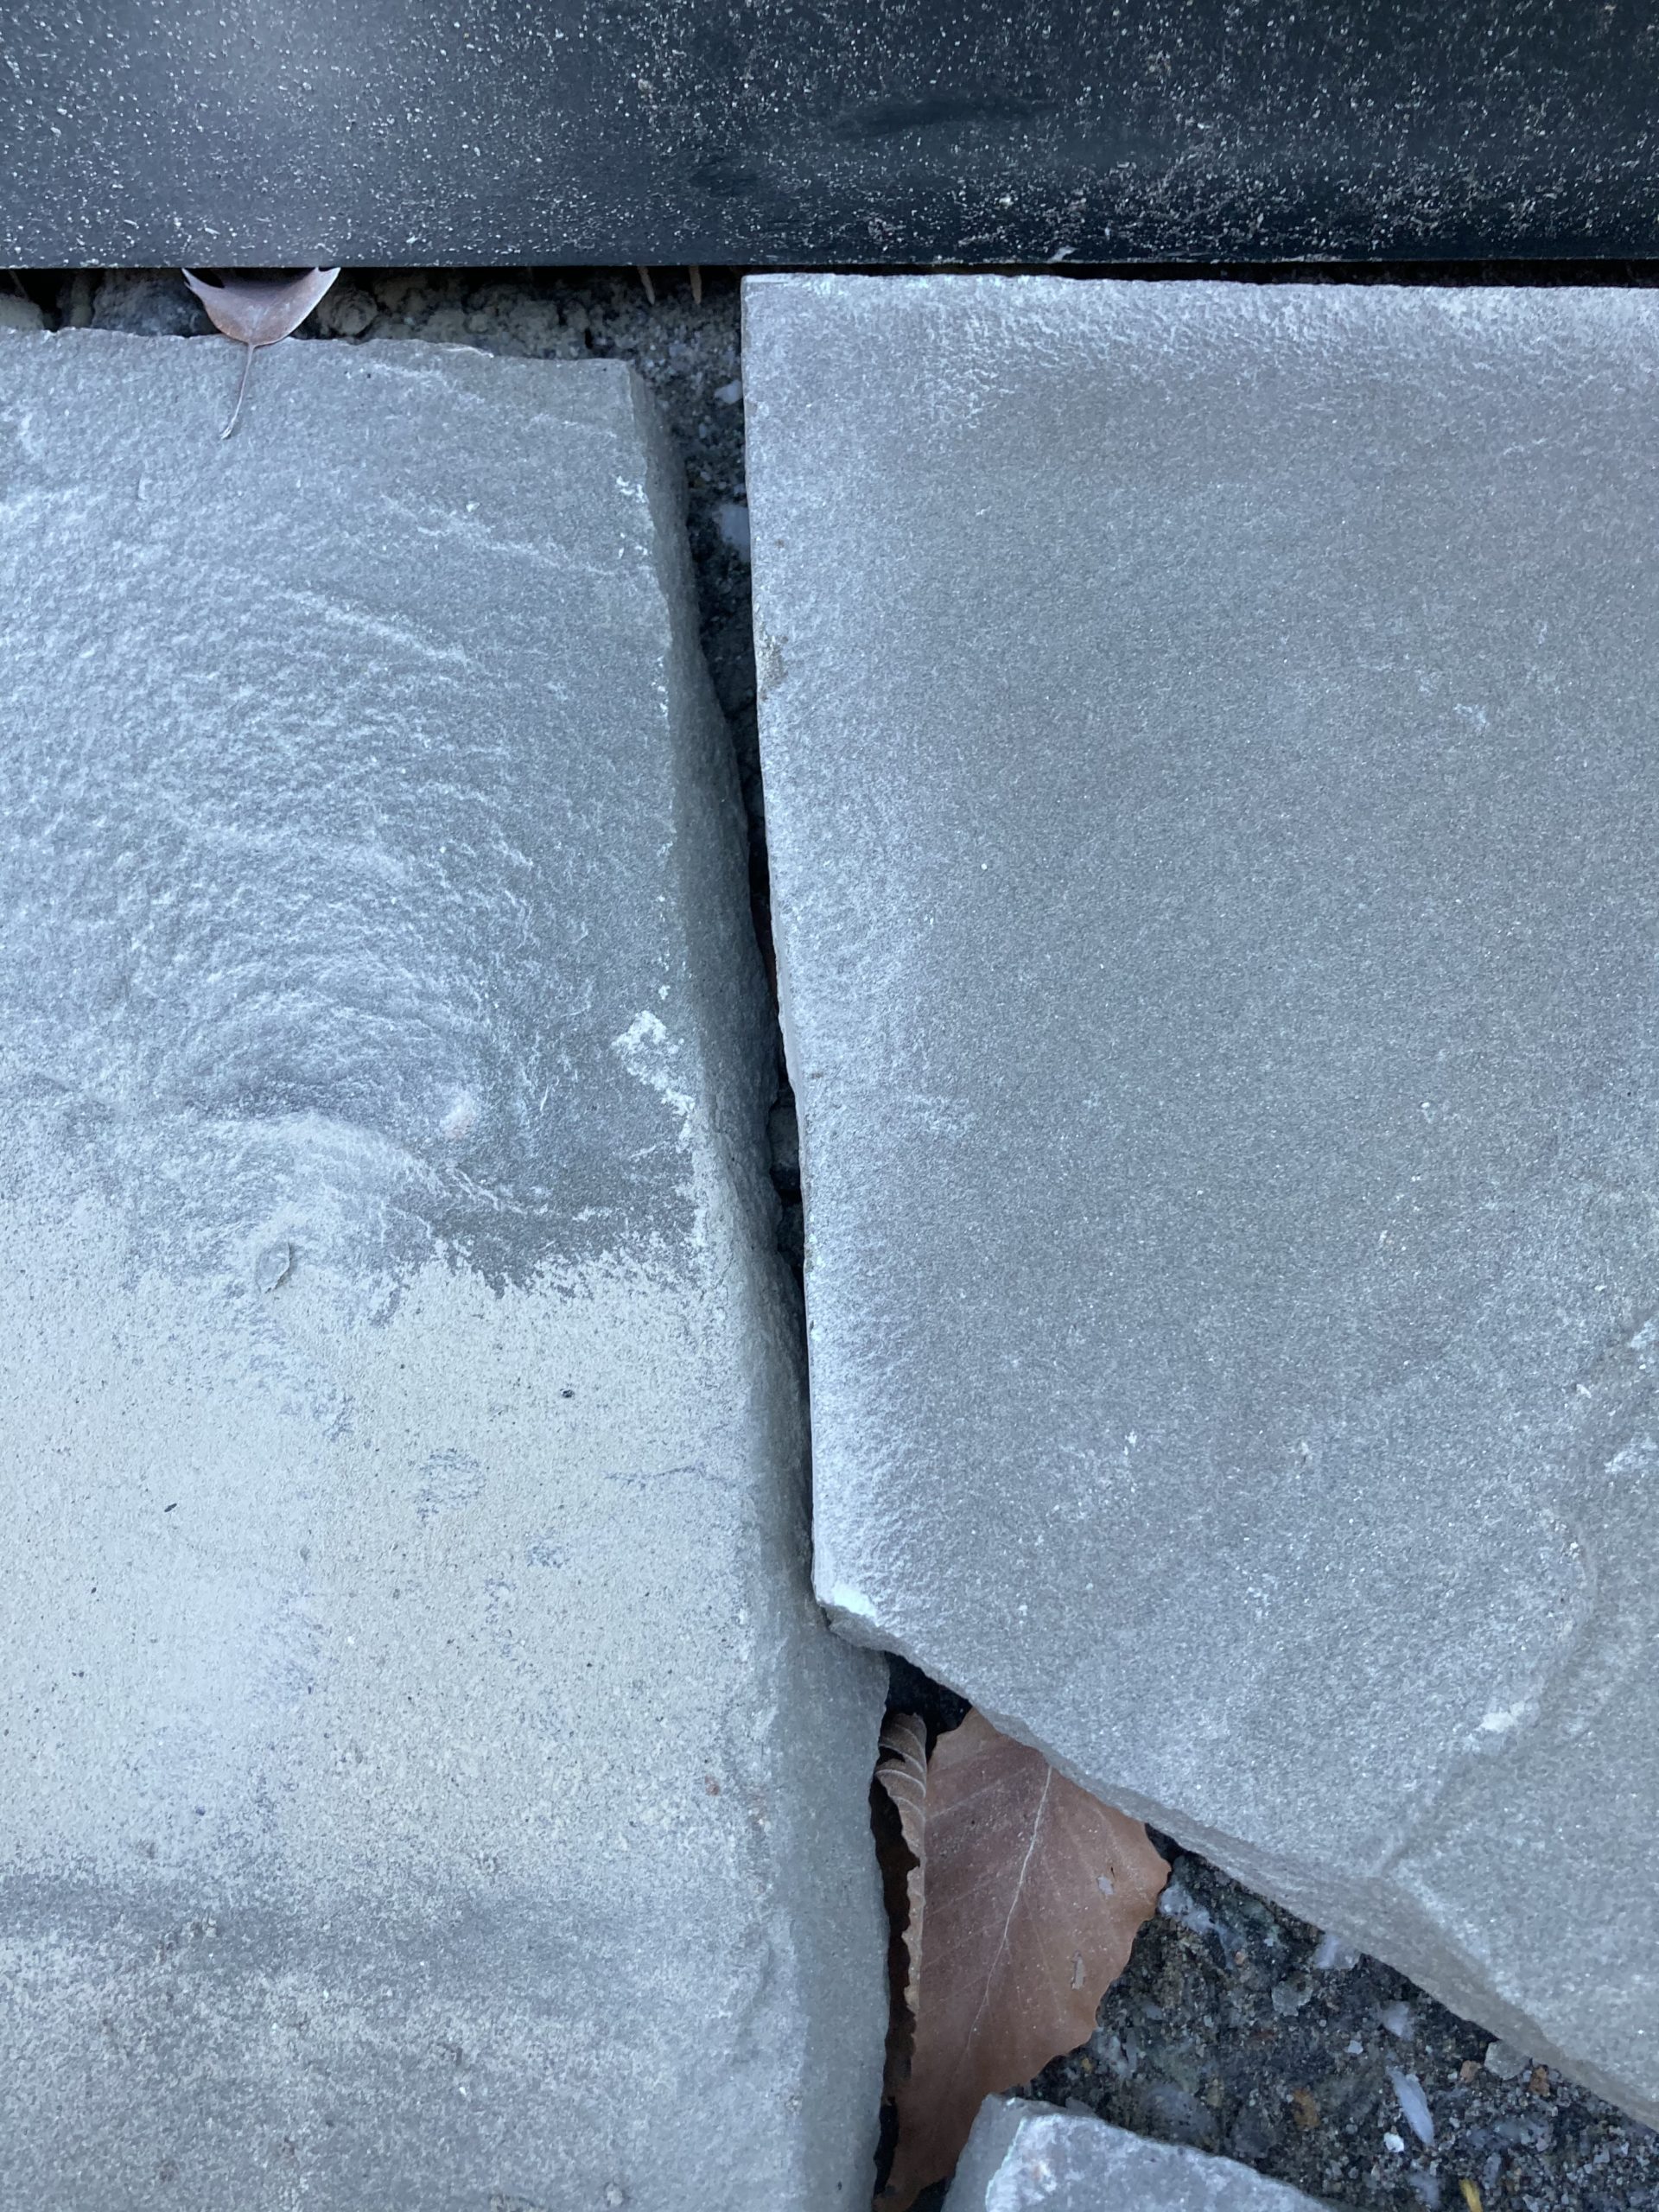
I spent the remaining time I had this day laying down a section of the patio. I labelled several stones so I knew their orientation and order, then removed them from the work area, spread out about an inch of stone dust, then set and leveled each stone, using string lines to make sure I maintained the correct grade. The topography here is pretty tricky because I wanted to avoid water running off into the field stone foundation of the little cottage. The grade slopes away from the main house and towards the cottage, so I ended up grading the patio to have a small hump in the middle, so water would runoff in either direction away from both the cottage and the main house.
I had a couple of stones fracture on me when setting them in the stone dust bedding. These were too thin at only a half inch or so and I should have avoided using them in the first place. It is tempting because the thin stones were really easy to cut, but I would advise sticking with stones an inch thick or more where possible. The upside is that it is quite easy to cut a replacement since you can use the cracked stone as a template.
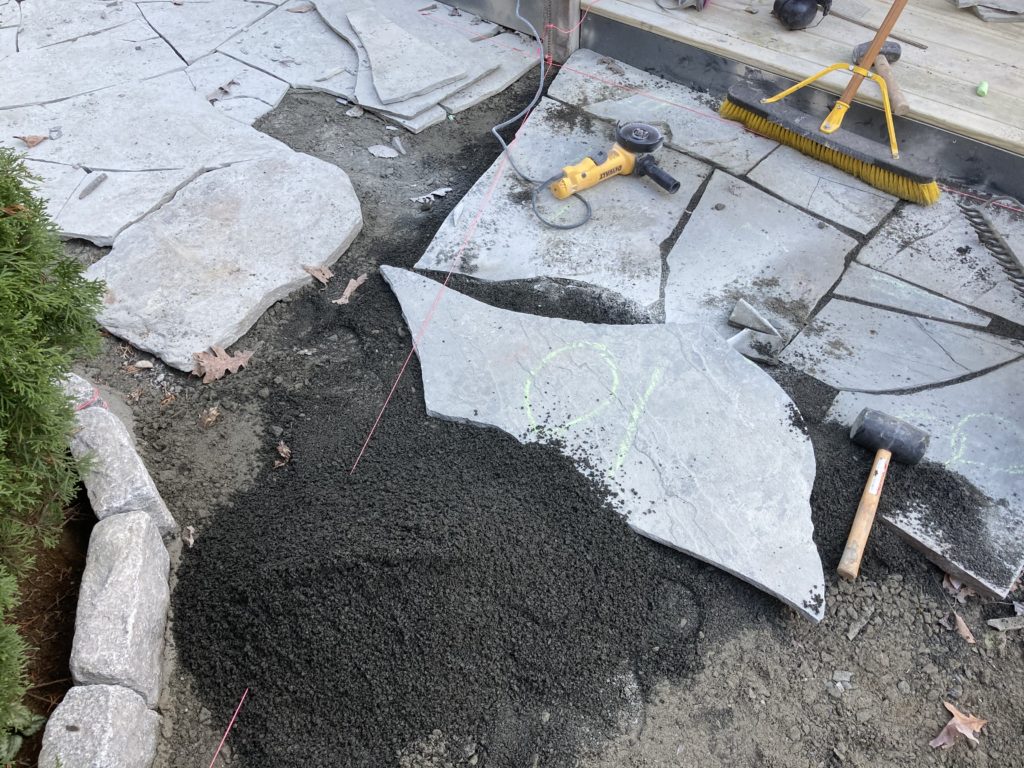
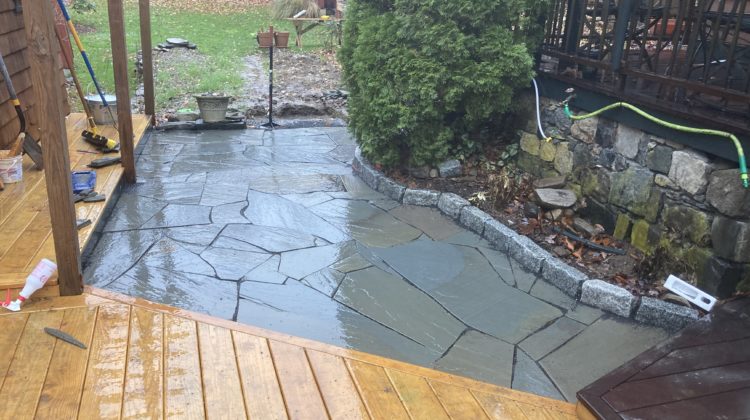
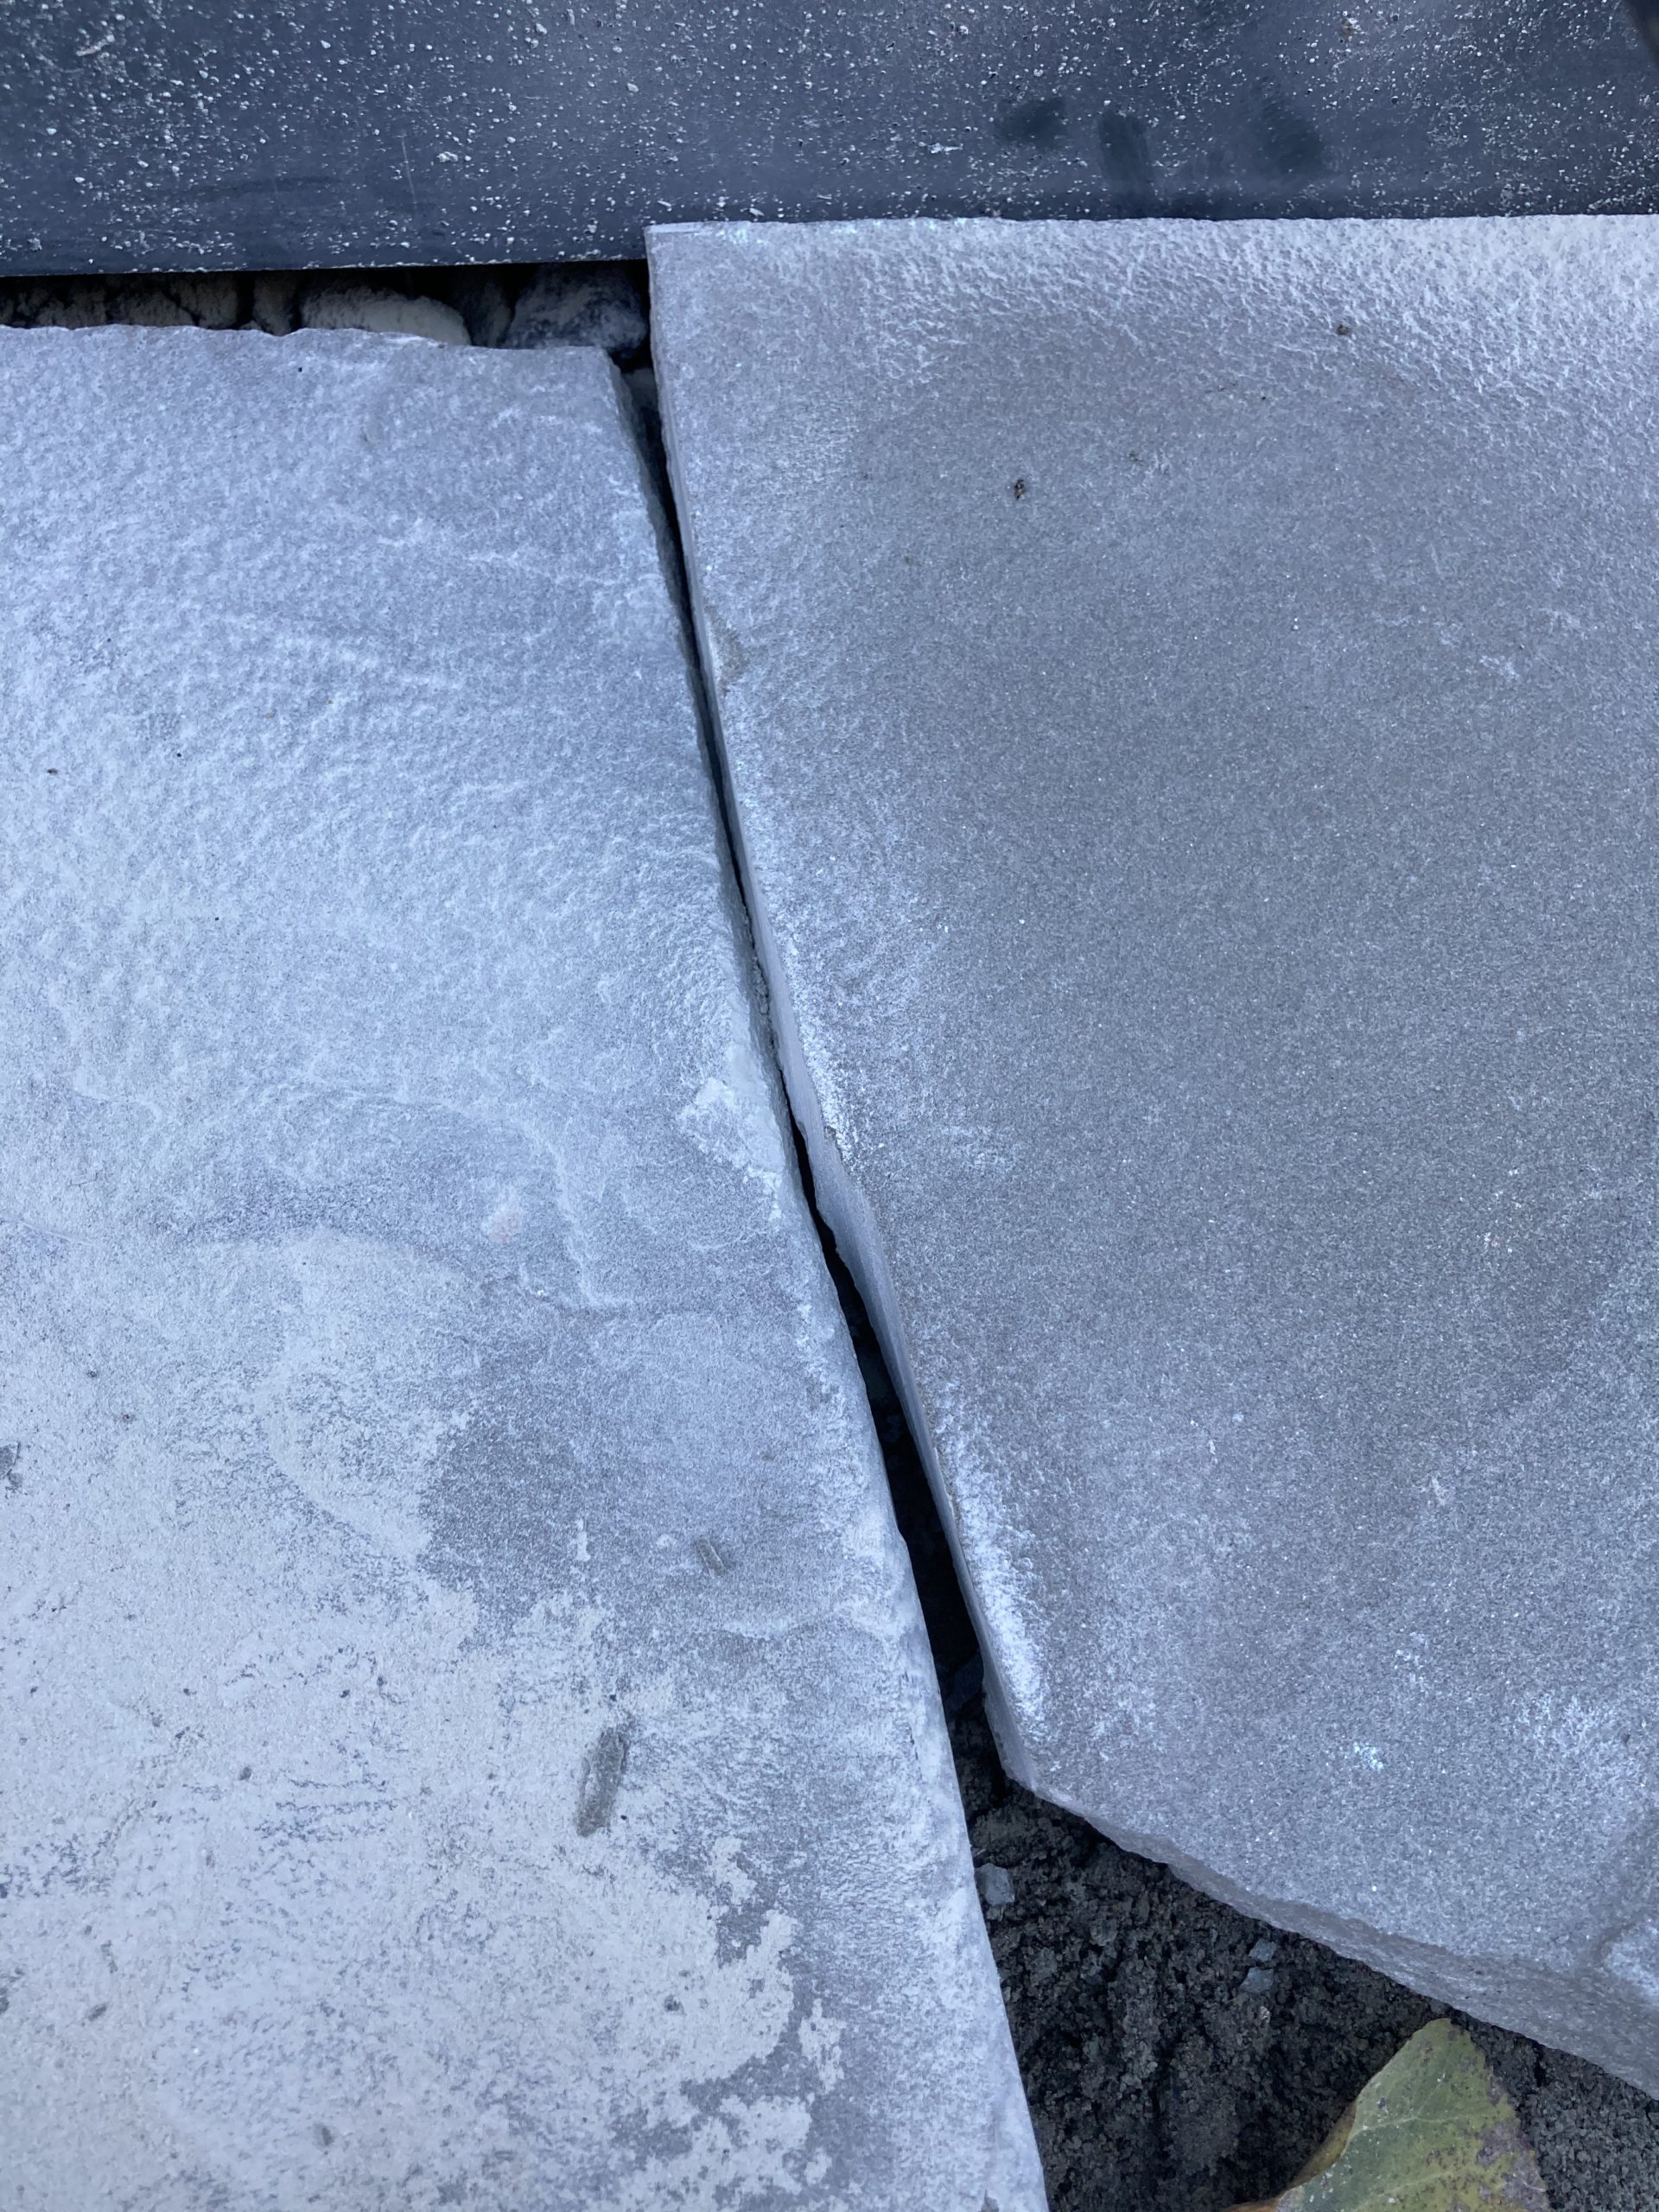
Day 7 (about 4 hours): I set my remaining “pre-cut” stones and then cut the final stones to fit along the Belgian block border. Then I swept stone dust into the joists, hosed down the patio, swept a bit more stone dust into joints, and finished up just as a steady rain started.

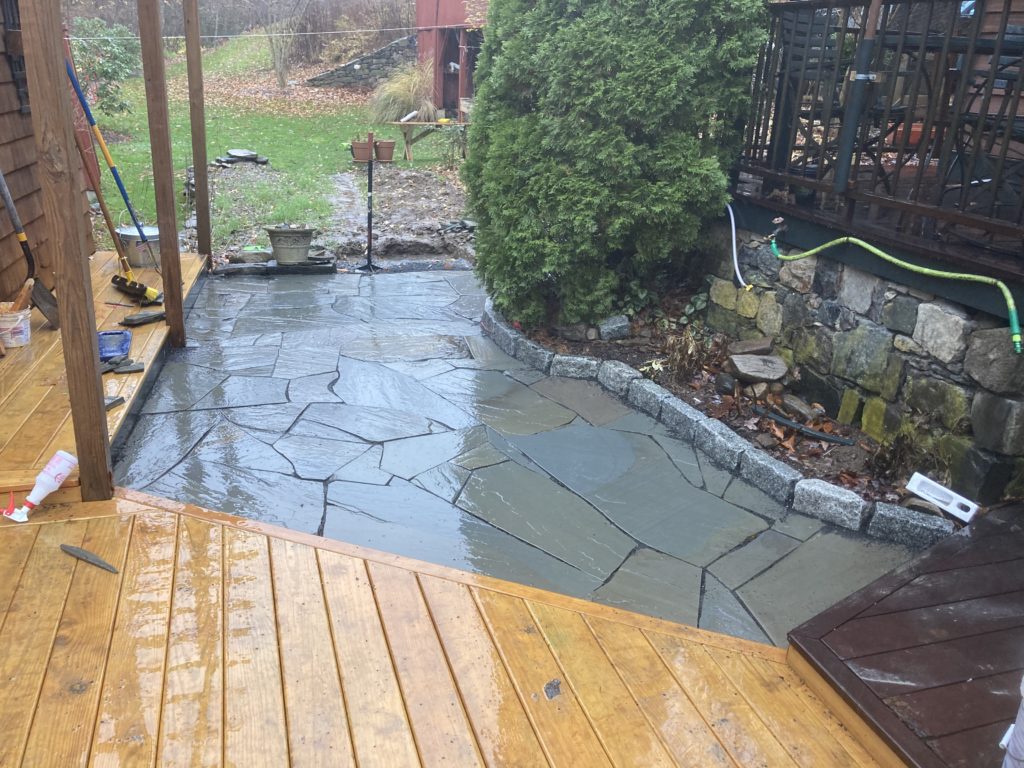
The patio looks great. I love the natural look of the irregular stone. Pavers will definitely save you some time, and look great, too, but I feel good about the decision to go with the flagstone. It was a lot of time invested at about 25 hours, but good, satisfying work, and breaking it up across multiple days really made a big difference.
[…] spanning several hundred square feet, I built both a 180ish square foot free stranding deck and a small flagstone patio. I went with deck for the larger part of the project because I preferred the work and felt more […]