There is really quite a lot that could be said about chicken coop design, far more than I want to write in a single post. So I will keep my thoughts concise and focus on the more interesting coop design considerations.
The first point I’ll make is that there are a few universal rules and best practices to follow. Features such as the height and width of roosts, pop door size, square footage per bird, etc. are important for the health of the flock and function of the coop and don’t need to be restated here.
Additionally, factors like the number and breed of chickens, climate, site, and budget are highly variable from case to case so there is simple answer to the question of “How To Build a Chicken Coop.” My coop, designed for 8-10 birds in a Zone 6 climate with a large paddock/free range setup, works well for me, but might not work so well for you.
I should note that I am no chicken expert, but I did my homework before getting a flock and designing and building a coop. The standard rules on predator proofing, ventilation and space per bird should be followed and there is no shortage of good information out there on these important topics.
Here’s what else I think is important that is somewhat discretionary but highly recommended for creating a coop that is extra user-friendly (for both you and the birds):
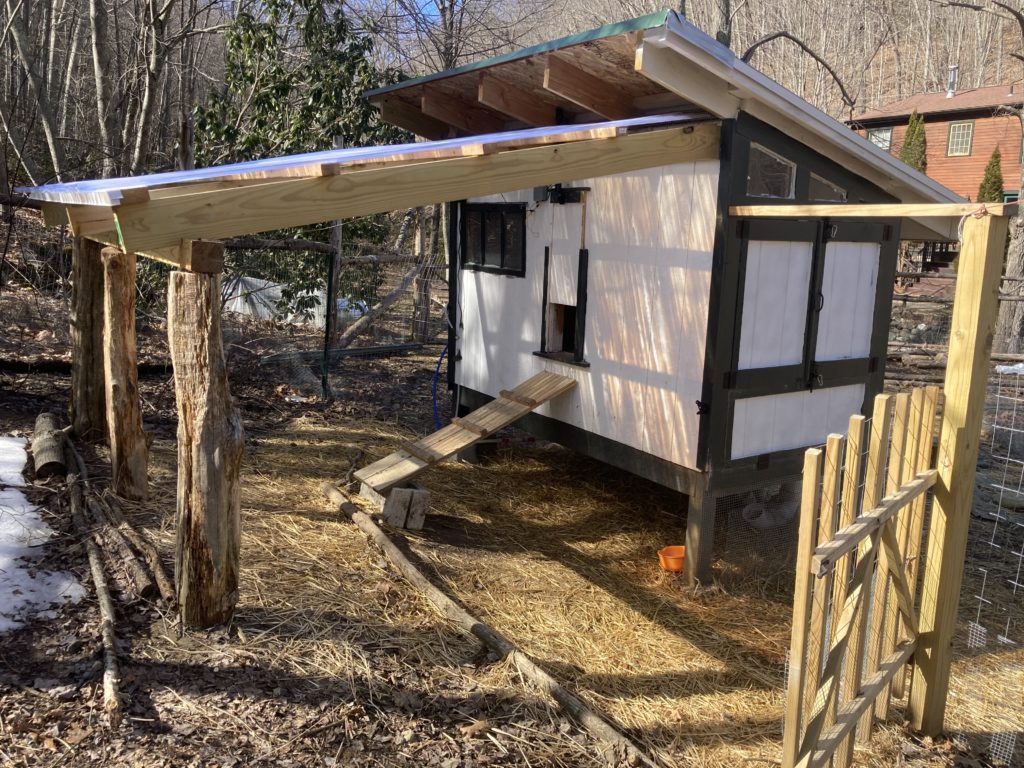
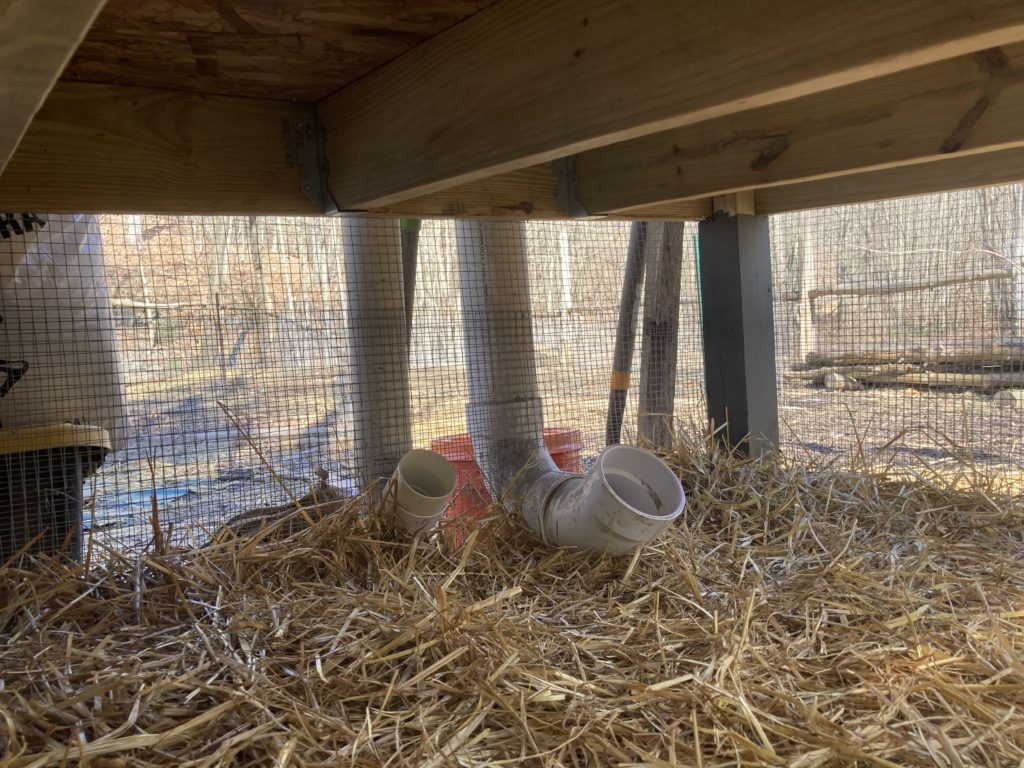
Get Your Coop Off The Ground And Put Food and Water Underneath
This seems logical to me, yet I don’t see all that many coops that are elevated. Reasons you should elevate your coop:
- You’ve doubled the usefulness of the space without increasing the footprint.
- By locating food and water under the coop, you are keeping the inevitable mess out of the main living area for the birds. This means more sanitary and therefore healthier living quarters.
- Shade and shelter from aerial predators are additional benefits for the chickens.
- Unless you are going to take the time to pour a proper foundation, elevating the coop on stilts will keep the structure high and dry and substantially increase the useful life of it while helping to reduce moisture and humidity from accumulating inside the coop.
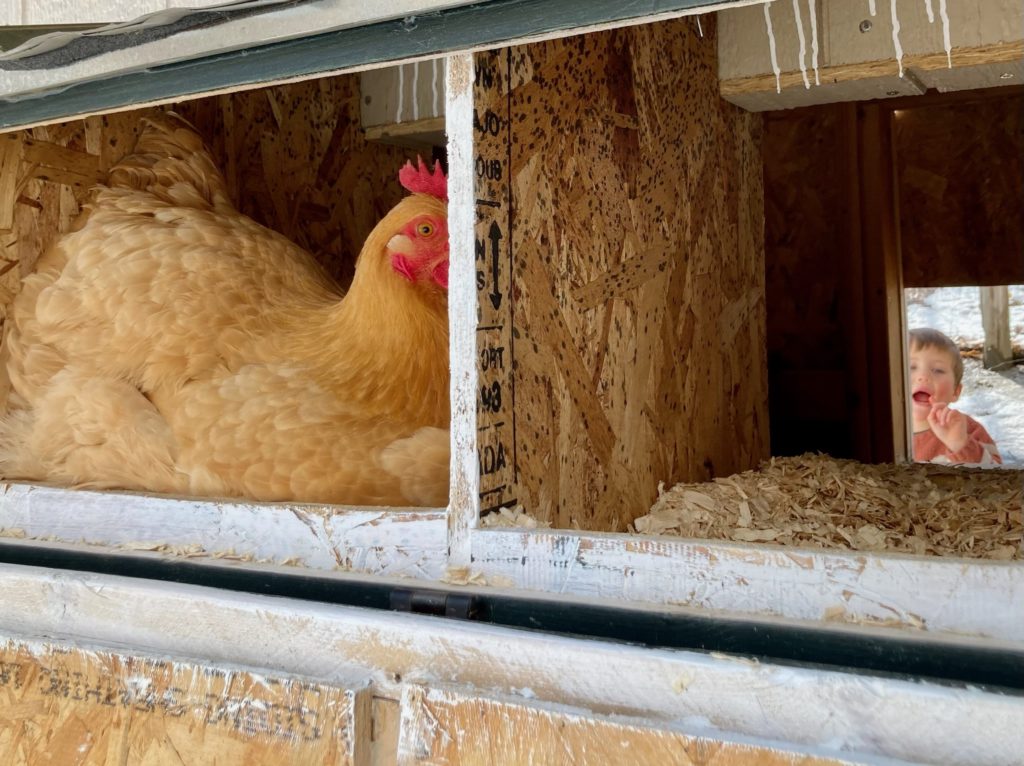
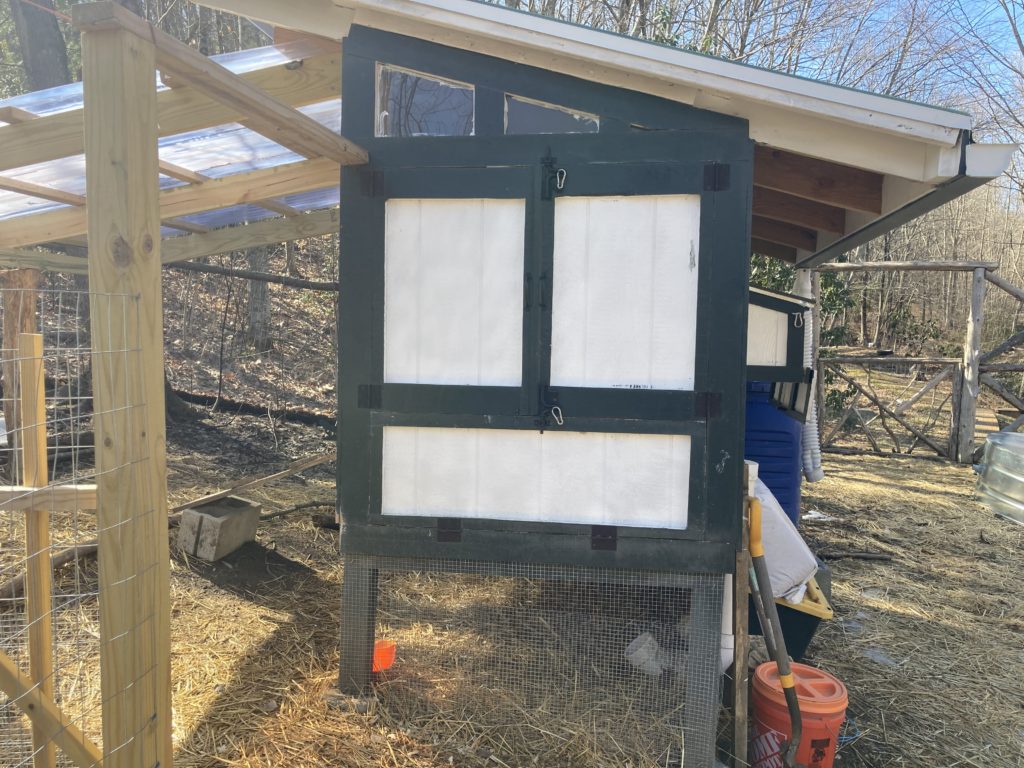
Make Cleaning and Egg Harvesting Easy
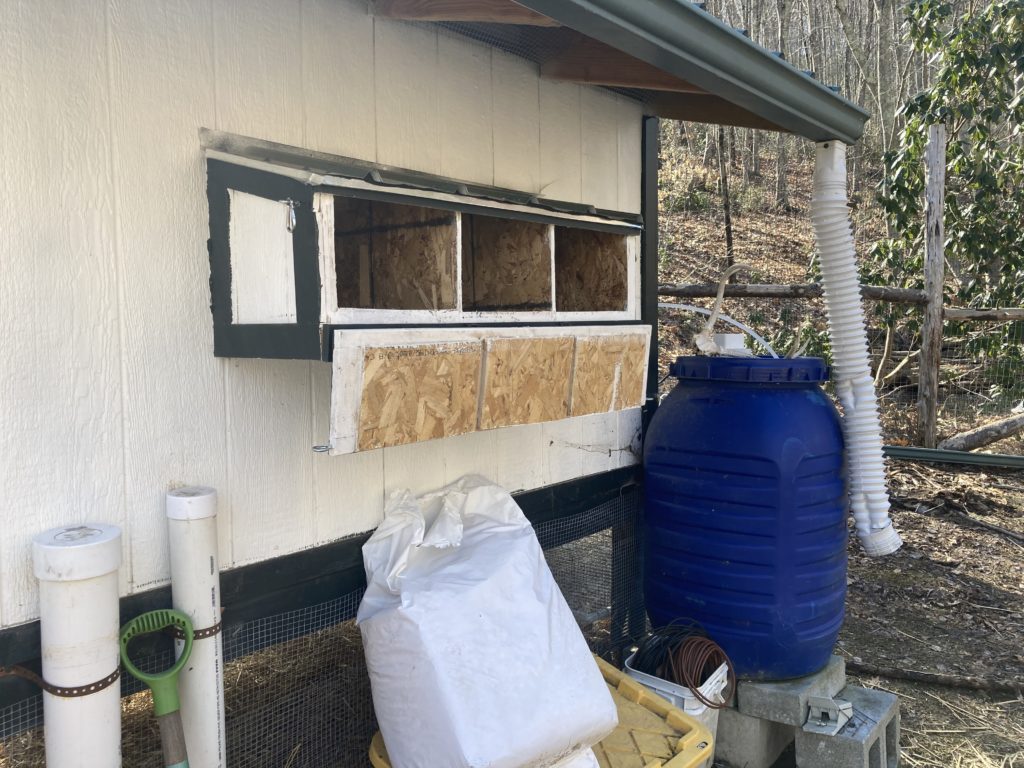
Eggs should ideally be collected a few times per day. Make this as easy as possible with an egg hutch that can be accessed without entering the coop. Building an externally accessed egg hutch may be a bit more complicated than an interior one because it needs a functional predator proof access door and possibly a sloped roof. In retrospect, I could have simplified things by forgoing the latter since the overhang on the main roof protects the egg hutch from snow loads.
I also designed my coop with enough height that a human can fit inside. The walls are 4′ on one side and 6′ on the other. It is not exactly roomy, but comfortable enough when I need to go in to do work on the coop interior. Regardless of the interior dimensions, think carefully about how you will clean the coop and keep it sanitary.
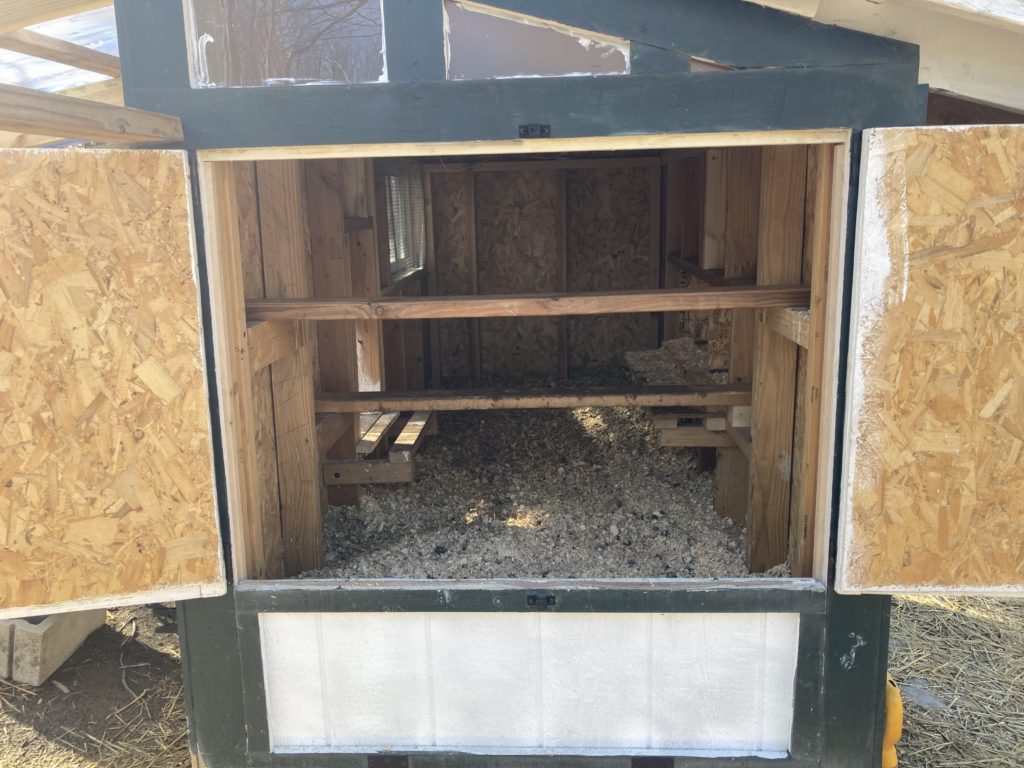
Design for the Deep Litter Method
I rarely need to clean the coop because I use the deep litter method. Some design considerations for deep litter:
- I located the roosting bars near the “human access” door, which makes it easy to add more shavings or mix overnight droppings without having to get inside the coop. Since most of the chicken poop in the coop is beneath the roosting bars, which is near the door, I just need to open the door to take care of that task with no need to get inside the coop. With a long rake I can reach the far side of the coop and completely sweep out the litter so the only reason I would ever need to go in the coop is for repairs.
- There is a lower door that swings open when it comes time to completely clean the coop. Just drop the hatch, wheel up a wheel barrow and sweep the deep litter into the wheel barrow.
- Make sure the pop door and egg hutches are elevated at least 18 inches off the coop floor so the litter stays where it is supposed to stay.
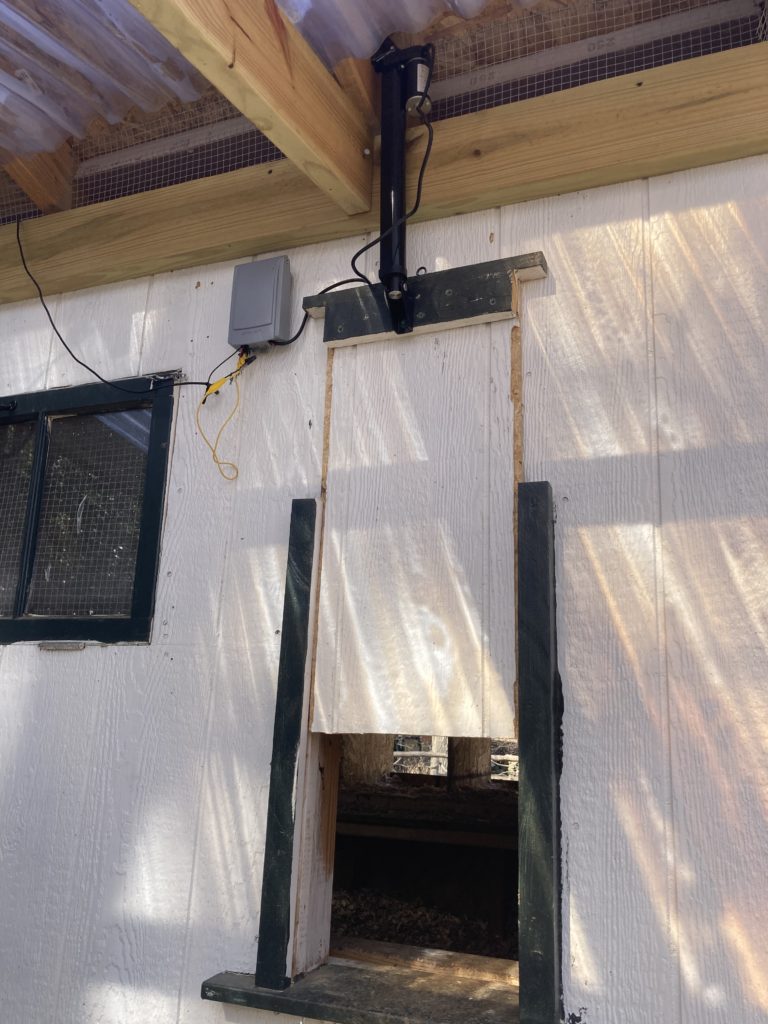
Use An Automatic Pop Door
Buy, or better yet, build one. I designed a guillotine style door and connected it to a linear actuator wired to a simple WiFi-controllable relay switch, which I programmed to run on Alexa. This may sound complicated but it really isn’t all that difficult to do. I spent about $45 on the parts and now I never have to worry about opening or closing the coop. I have an Alexa routine that opens the door automatically a little after sunrise and then closes it a little after sunset. It works great, although you obviously need electricity at the coop to be able to do this (although I’m pretty sure you could make it work using solar and a 12v battery with some additional engineering).
- This is the actuator I used.
- And this is the smart relay.
Heated Waterer and Auto Feeders
Some people are really committed to their chickens. I myself very much enjoy our little backyard flock, but I don’t want chickens to run my life. Other than gathering eggs, our setup is automated to the point that we can go away for at least a week and the gals will be just fine. There are lots of PVC auto feeder designs out there on the Internet. I’ve tried a few and found that my birds prefer our feeder with a 45 elbow instead of the J-tube style although they both work and can hold a lot of feed.
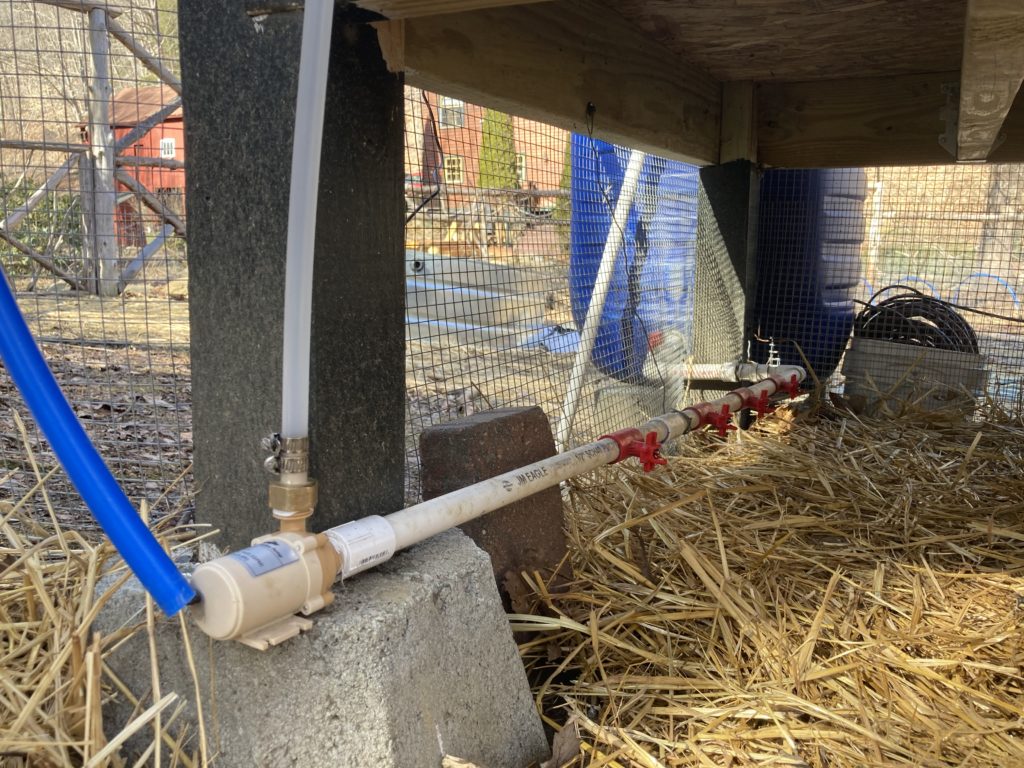
More importantly, I (almost) never have to haul water out to the flock, which is a nice feature any time of year, but especially when it is 15F outside. I rigged up a 55-gallon rain barrel that catches runoff from the metal roof on the coop. It is plumbed to a PVC outlet pipe at the bottom of the barrel which runs under the coop where the chicken waterers are attached to the pipe. At the end of the pipe run is a tiny DC pump that circulates the water back up to the rain barrel. The pump is really efficient and costs me $12/year to run 24/7. Keeping the water in circulation helps prevent bacteria from accumulating in the warm months and freezing from occurring in the cold months. I do also have a bucket heater inside the barrel, which kicks on when the temps approach freezing. So far, I haven’t had too many problems with this system. In the interest of saving money on operating the heater, I opted for a low wattage unit. I’ve found that while a full barrel (55 gallons) won’t freeze (temps are routinely reach the single digits for a few days at a time in my climate), the little nipples on the chicken waters do freeze over when it gets really cold. If I only let the rain barrel fill halfway, the bucket heater keeps the water warm enough that as it circulates through the pipe the nipples will remain functional down into the upper single digits. Unfortunately, when it gets really cold (low single digits and colder), the nipples freeze. I’m sure there is a solution that will work for this scenario (such as heating element in the pipe), but I’m not going to worry about it since we usually only have a couple of days that cold every winter.
For reference, this is the pump I’m using and this is the bucket heater.
Good luck with your coop building!
[…] 3″, slid a little 3″ PVC sleeve that I cut from drain pipe I had around from making a chicken auto feeder, and then I was able to easily pass the line set through without having to worry about kinking the […]