Is there a better design choice for a simple organization system for the various items in your home that require hanging when not in active use? Shaker design is still commonly used in many modern woodworking and cabinetry applications. While building a Shaker cabinet face frame is perhaps out of reach for the average homeowner, building your own Shaker peg rail from scratch is easily accomplished with just a handful of tools and little experience. Of course, there is no shortage of inexpensive Shaker peg rails available for purchase online, and the justification for building your own probably lies with either a) the need for something custom and/or b) the desire to simply make your own for the satisfaction of doing it yourself.
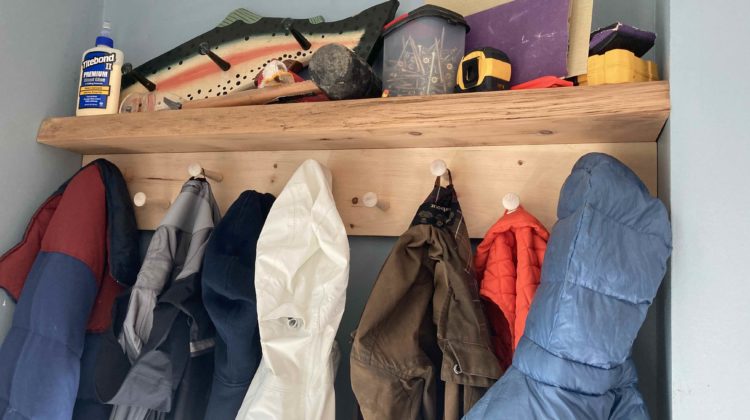
In my case, it was both of the above. A few months ago I built-in this little entryway bench and shoe storage by our back door. A three hook coat rack had occupied the space above the bench since we purchased the house in 2016. Three hooks was so woefully inadequate that the excess coats would pile up on the bench or clutter the other Shaker peg rail in our kitchen or take up residence on the floor at various entry points eventually fulfilling the role of doormat. So, we wanted to maximize hanging options while also maintaining a period appropriate look and clean aesthetic.
To be honest, I didn’t even consider purchasing something “over the counter.” I wanted the peg rail in a very specific length (down to a 7/8 of an inch) and while I probably could have bought something and hacked off a bit on either end to make it fit perfectly, it seemed like I might spend as long searching for an appropriate product and then cutting it down to size as I would just making it myself.
The classic Shaker peg rail design spaces a single row of pegs at intervals of 6 inches along a 3 to 4 inch wide board. I wanted two rows of pegs to provide more hanging options, for a total of 9 pegs over a span of about 3 feet. I ordered two 8-packs of maple shaker pegs from Rockler ($13.98 for each pack, so about $1.75 per peg. In retrospect, it might have been prudent to use maple or another hardwood for the board, too. However, I didn’t have any on hand when a rainy day provided the impetus to turn my attention from my fall exterior projects to this long overdue improvement to the entryway. I had several 1×6 premium grade pine boards waiting to be put to use and had also made a mental note to repurpose some scrap antique pine from my farmhouse table project as a shelf, so I decided to just go with the pine board. Why might this be a problem? Softwoods like pine “move” a lot more than hardwoods. The seasonal expansion of pine is more pronounced than a hardwood, so it is conceivable that the pegs might become loose. We’ll have to see what happens. It could be a non-issue, but it would also be no big deal to build a new one from hardwood in the future if needed.

I started by laying out the holes for the pegs. I wanted a top row with 5 pegs and a lower role, offset, with 4 pegs. Some simple math yields the spacing of each of these pegs so that they are evenly spaced from each other and the pegs on either side are evenly spaced from the edges. In my case, this ended up being just over 7 inches between pegs and about 3.5 inches from the sides of the first and last top row pegs. So that takes care of the horizontal layout. For the vertical layout, I wanted the two rows to be evenly spaced from each other and the top and bottom edges. A 1×6 is 5.5″ wide so I divided 5.5 by 3 to figure out the spacing. 5.5 divided by 3 is 1.83 which is essentially 1 and 13/16″. Using a combination square, I marked 1 13/16″ from either edge of the board at the ~7 inch spacing determined from the first step. So, now you’ve got your centers for each peg hole. This doesn’t need to be exact down to the 64th of an inch, but marking errors of a half inch or more would be noticeable to the human eye, so be sure to take your time and use an accurate marking tool.
It’s worth noting that there is an argument for painting or staining your board before you do the layout for the peg holes. It will be easier to apply a finish if you don’t have to work around the pegs. I hate finishing so naturally procrastinate that part of the job, even if it means more work later. Don’t be like me and do yourself the favor of finishing before proceeding. Alternatively, you could install the pegs and then spray a finish on.
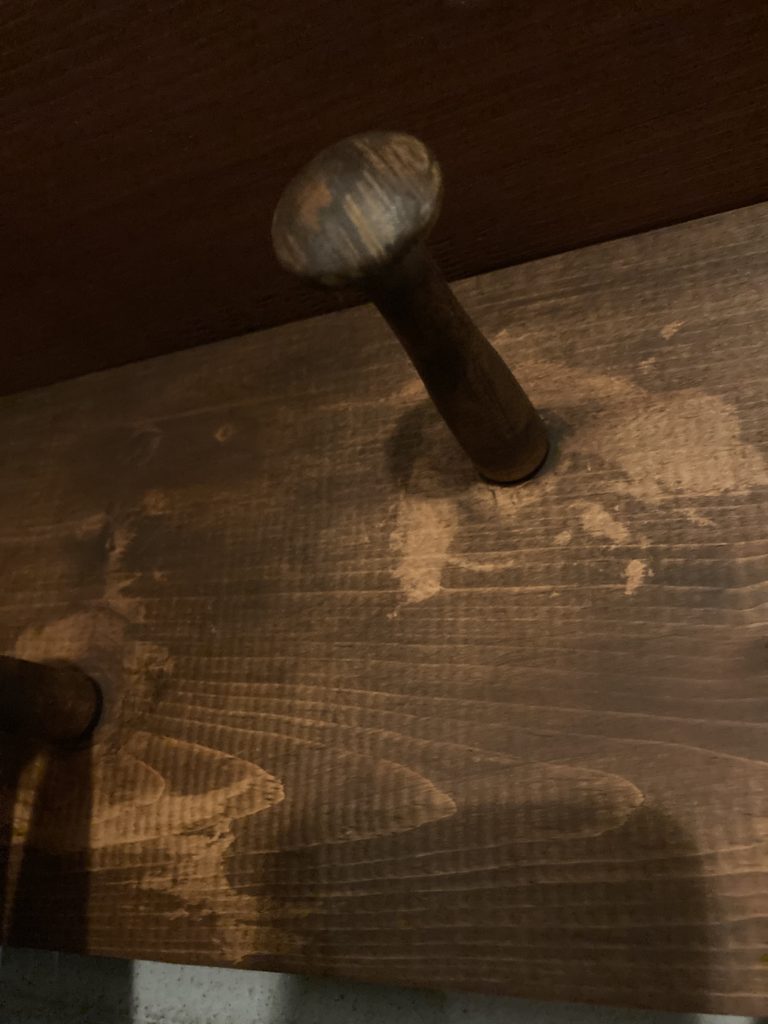
The size of the hole you drill will depend on the peg diameter. You want the peg to fit snugly so match the drill bit size to the diameter exactly, but drill your hole a little deeper (about 1/16″) than the peg base so that you leave a little space for glue. I used a drill press to drill the holes for the pegs. A regular handheld drill will certainly work, but the drill press allows you to easily set the depth and ensures a perfectly straight hole. If you are using a handheld drill, you may want to use a piece of tape on your bit as a depth gauge and take care to keep your drill bit as steady as possible so you get a nice hole for your peg.

Liberally apply wood glue to the entire peg base and then use a rubber mallet to tap the peg into the hole. It should be a tight fit, but a couple of solid taps is all it takes to secure the peg. You should see some squeeze out of the glue. Clean that up quickly with a damp rag or you’ll have to sand it off when it is dried.
At this point, I intended to stain the finished rail to match the bench top before fastening it to the wall. But, I didn’t feel like dealing with that, but wanted to get the functionality of the 9 new pegs working for us, so I decided to put the rail up thinking that I would simply back the screws out whenever I got around to staining. Securing the rail to the wall is easy enough. I located to two studs, drilled a pilot through the board and into the studs, then swapped out the bit for a larger one about the side of the screw head I would use to fasten the rail to the wall, and drilled a shallow depression so that the screw heads would be recessed about 1/4″ below the board surface (called countersinking).

The shelf above the peg rail is just floating for now. I had an off-cut from these massive white pine planks salvaged from an Amish barn that I’m building a farmhouse table out of. It seemed like a cool shelf option, so I went with it and it fits so snugly that doesn’t need any fasteners, although I do plan on eventually securing it into the studs in the wall.
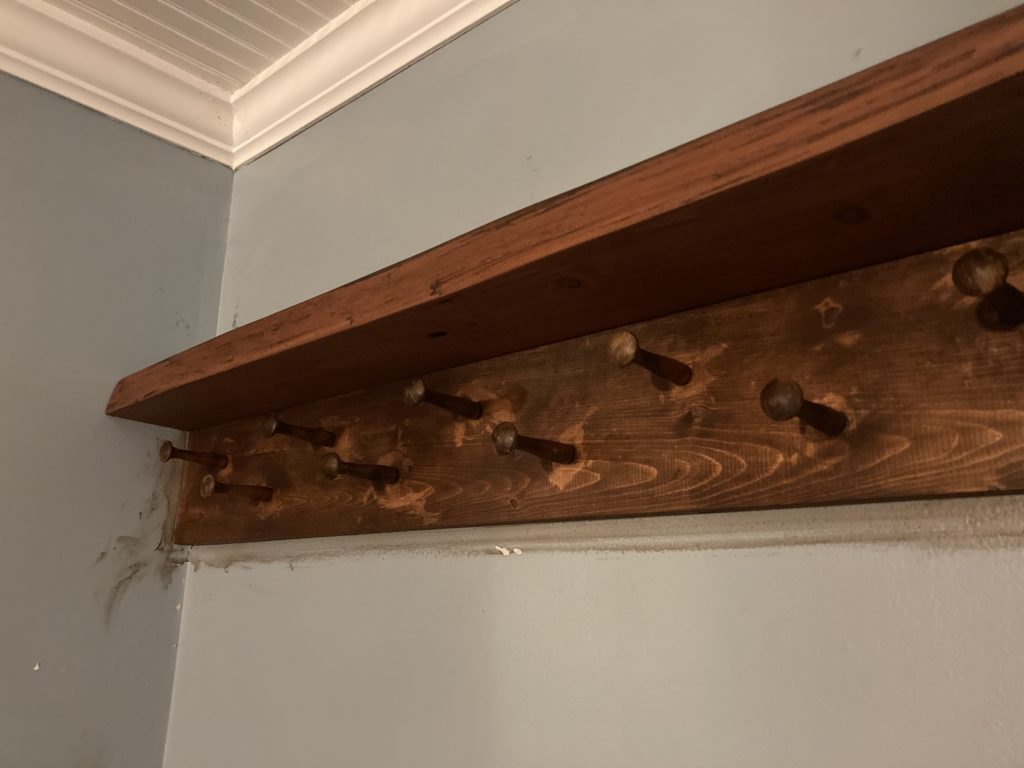
We left the shaker peg rail unfinished for a few weeks, but I did get around to staining it. Remember when I mentioned previously that it is really important to clean up any glue squeeze out. Why don’t I listen to myself?! I thought I had done a sufficient job and even lightly sanded the areas around the pegs, but my staining reveals what a poor job I did.
That just looks terrible. I was of the opinion that I would try stain first and see how it looks, but could always apply paint if I wasn’t happy. In my experience it isn’t easy to get a good finish staining pine, and the peg board will be getting a coat of white paint t match the trim since this is just so obviously not a satisfactory result. The pine shelf on the other hand took the stain beautifully. I suppose 150 years really goes a long way towards tightening up that wood grain.
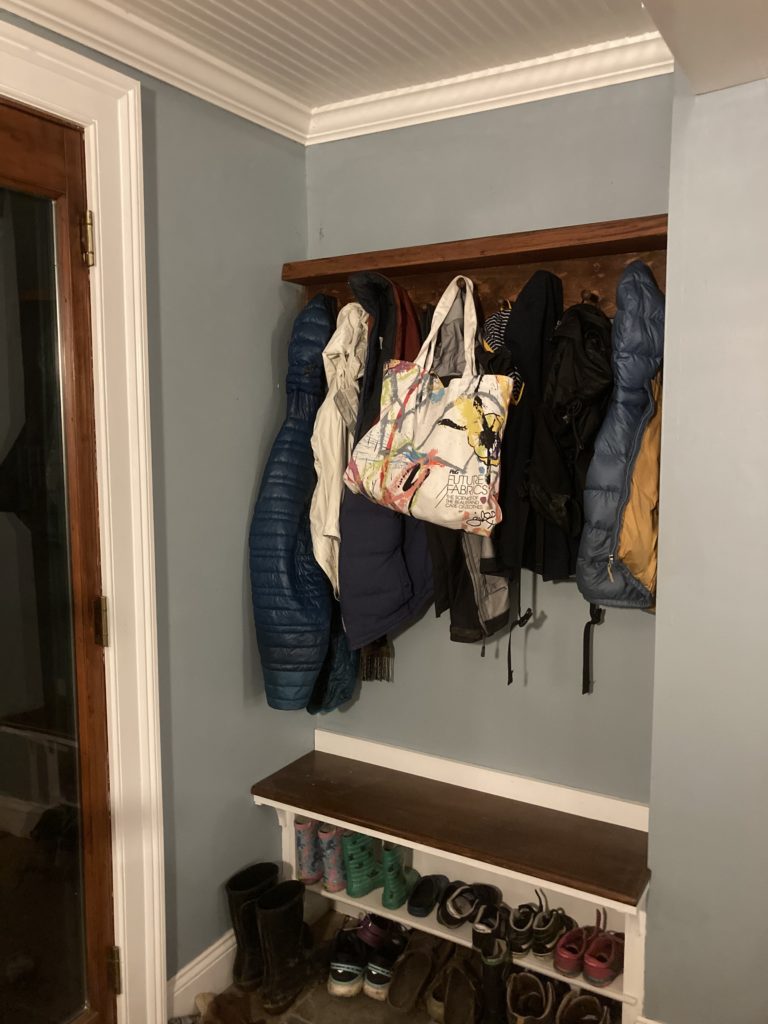
Did I mention how much I dislike finishing? I’ll probably live with this awful stain job and the slop on the walls for weeks if not months, but will eventually truly and actually be done with this project. Here is what the whole entryway looks like now. The bench build is discussed in this post.
Despite the less than awesome finishing, this was a super easy project. I have at least two other spots in mind for a Shaker peg rail upgrade. The active time to build one can be measured in minutes, so go build your own today!
[…] This was just the first (bottom) half of this entryway project. The upper half is discussed in this post about making a Shaker peg rail with shelf. […]